Pruning
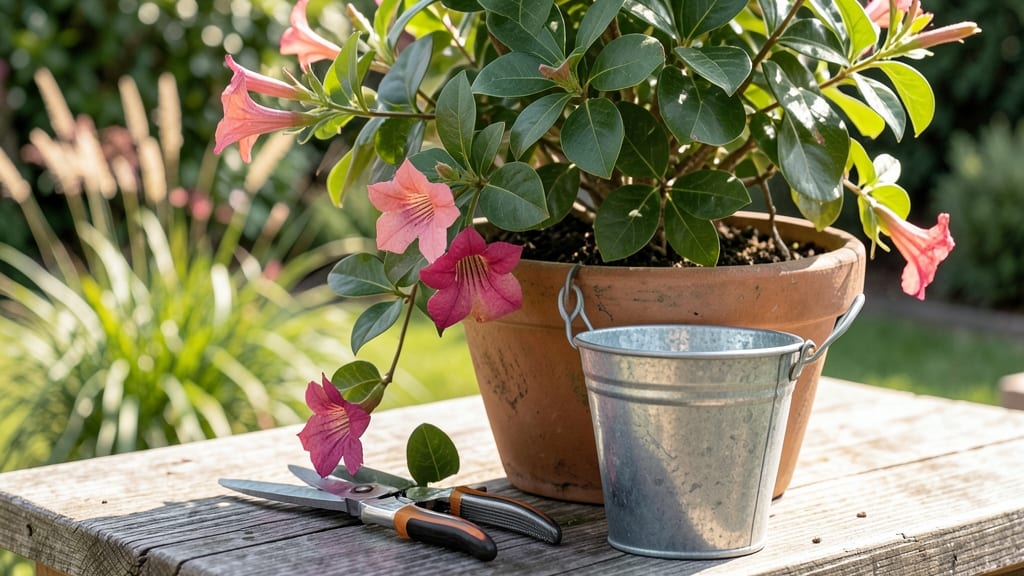
Pruning Dipladenia plants transforms them from occasional bloomers into year-round showstoppers—and I’ve mastered the exact timing and cuts that keep mine covered in trumpet-shaped flowers from spring through fall. 🌸 The key isn’t just when you cut, but how you shape the plant to encourage new growth where it matters most.
You’ll need just three tools: sharp bypass pruners, clean rubbing alcohol for sterilizing cuts, and a small pair of gloves (Dipladenia sap isn’t toxic, but it can irritate skin). The real secret?
Pruning in three strategic windows: late winter for structural shaping, mid-summer to remove spent blooms, and a light touch in early fall to prep for winter. Each trim takes less than 20 minutes and sets the stage for the next flush of flowers.
After pruning, your Dipladenia will respond with bold new shoots within weeks—those are the branches that’ll produce next season’s blooms. The first flush arrives in 4-6 weeks, and with consistent care, you’ll have flowers 12 months a year in warmer climates.
The plant stays compact, bushier, and far more productive than the leggy, sparse versions you see at nurseries.
This method works for both container and in-ground Dipladenias, though potted plants need slightly more frequent trims to prevent root-bound stress. Whether you’re dealing with a Mandevilla ‘Alice du Pont’ or a trailing variety, the same principles apply.
Let’s get those shears ready—your plant’s about to bloom like never before.
📚 In This Guide
- What you need
- Instructions
- Tips and common mistakes
- Wrapping up and next steps
What you need
- ● Pruning shears: Sharp, bypass pruners (not anvil-type) to make clean cuts. Size: 5–7 inches for precision.
- ● Gloves: Heavy-duty gardening gloves (thick leather or synthetic) to protect from thorns and sap.
- ● Disinfectant: 70% isopropyl alcohol or a bleach solution (1 part bleach to 9 parts water) to sterilize tools between cuts.
- ● Rubbing alcohol or hydrogen peroxide: For cleaning sap off tools and skin if needed.
- ○ Sharpie or permanent marker: To label pruned sections (optional but helpful for tracking growth).
- ● Hand pruners: Smaller, ergonomic shears for tight spaces or delicate stems.
- ● Loppers: For thicker stems (if your Dipladenia has woody growth). Size: 8–12 inches.
- ● Rooting hormone: If you plan to propagate cuttings from pruned stems.
- ● Pruning saw: Only for very thick stems (rare in Dipladenia but useful for mature plants).
- ● Plant food: Balanced fertilizer (e.g., 10-10-10) to nourish the plant post-pruning.
- ● Choose a bright, sunny day (avoid pruning in extreme heat or cold).
- ● Water the plant 24 hours before pruning to reduce stress.
- ● Have a clean workspace (e.g., a tarp or tray) to collect clippings.
Step-by-step guide to dipladenia plant pruning for continuous blooms
Here's how I keep my dipladenia flowering nonstop—three strategic cuts a year transform leggy vines into a lush, blooming powerhouse.
✂️ Step 1: Late Winter Pruning (Before New Growth Begins)
This is the most critical cut of the year. Wait until late February or early March when your dipladenia is completely dormant—no leaves, no buds, just bare stems. Grab your sterilized pruners and cut back one-third of the plant's height, targeting the oldest, woodiest stems first. You're essentially resetting the plant to focus energy on fresh, vigorous growth.
Make cuts just above a leaf node or bud, angled slightly downward to prevent water pooling. I like to shape it into a rounded form—this encourages outward growth rather than a single central leader. If you see any dead or diseased stems, remove those entirely. This step sets the foundation for the entire growing season.
☀️ Step 2: Mid-Summer Light Pruning (After First Major Bloom)
Around mid-July, your dipladenia will have its first major flush of flowers. Once 70-80% of blooms have faded, it's time for a lighter trim. Focus on removing only the spent flower clusters and any stems that are growing too leggy or crowded. This encourages the plant to produce new side shoots that will bloom again later in the season.
I use my fingers for this step—pinching back just above the third or fourth leaf from the top of each stem. Avoid heavy cutting now; you're just tidying up. Watch for new buds forming at the leaf nodes—these are your future blooms. This mid-season maintenance prevents the plant from becoming overgrown and ensures continuous flowering.
🌿 Step 3: Post-Bloom Renewal (Late Fall Cleanup)
After your dipladenia's final flush of fall blooms—typically in October or November—perform a final light pruning to prepare for winter. Remove any remaining spent flowers and any stems that look exhausted or overgrown. Cut back only the tips of leggy growth by about one-quarter of their length, again focusing on shaping rather than drastic reduction.
This final trim stimulates a modest flush of winter blooms in mild climates and ensures the plant enters dormancy in good shape. I always clean up any fallen leaves or debris around the base—dipladenia is susceptible to fungal issues, and keeping the area tidy prevents problems. If you're in a colder zone, you can move potted plants to a sheltered location after this pruning.
⏰ Step 4: Year-Round Maintenance Checks
Between these seasonal trims, perform monthly inspections. Remove any yellowing or diseased leaves immediately with sterilized pruners. If you notice stems growing too long without blooming, give them a light pinch to encourage branching. This ongoing maintenance prevents the plant from becoming too leggy between major pruning sessions.
Pay attention to how your dipladenia responds—if it's particularly vigorous, you might need to prune slightly more aggressively. If it's struggling, scale back. The key is balance: enough pruning to maintain shape and encourage blooms, but not so much that you stress the plant. With this approach, you'll have dipladenia blooms from spring through fall, with careful management extending into winter.
Tips & tricks for perfect dipladenia plant pruning
A few strategic adjustments can transform your dipladenia from a leggy vine into a nonstop blooming beauty. Here's what I've learned after years of trial and error.
Timing is Everything: The late February/March window for your first pruning is non-negotiable. If you prune too early, you risk cutting back new growth that's just starting. I always check for completely bare stems—no leaves, no buds—before I start cutting. This dormant state ensures the plant isn't storing energy for new growth yet, so it focuses all its resources on the fresh stems you're encouraging. For those in warmer climates, you might need to adjust to early March to avoid cutting back any premature growth.
Pruning Technique That Changed Everything: When making your cuts in Step 1, aim for a 45-degree angle just above a leaf node or bud. This angled cut prevents water from pooling at the stem junction, which dramatically reduces the risk of fungal infections. I've seen dipladenia plants develop black rot from poor cut angles—it's heartbreaking after all that careful pruning. Also, resist the urge to cut too close to the base; leave at least an inch of stem to prevent damage to the main growth point. The rounded shape I mentioned isn't just aesthetic—it creates better air circulation throughout the plant.
Mid-Season Maintenance Strategy: During your mid-July light pruning, focus on creating balance rather than just removing spent blooms. I look for stems that are growing toward the center of the plant and pinch them back to encourage outward growth. This creates a fuller, bushier plant that produces more blooms overall. A quick trick: if you see a stem with new buds forming at the leaf nodes, leave it alone—those buds will become your next flush of flowers. The key is to remove only what's clearly spent or overcrowding.
Winter Preparation Insight: That final fall trim in October/November is your chance to set up next year's success. I always take this opportunity to evaluate the plant's overall health. If I notice any stems that consistently fail to bloom, I remove them entirely—they're not contributing to the plant's vigor. For potted dipladenia, this is also when I do my annual root check. Gently remove the plant from its pot and trim any circling roots with sterilized pruners before repotting. This simple step can make a huge difference in the plant's health and blooming potential.
Pro Tips for Dipladenia Plant Pruning
- A few strategic adjustments can transform your dipladenia from a leggy vine into a nonstop blooming beauty. Here's wh...
- Timing is Everything: The late February/March window for your first pruning is non-negotiable. If you prune too early...
- Pruning Technique That Changed Everything: When making your cuts in Step 1, aim for a 45-degree angle just above a le...
Frequently asked questions
Got questions about pruning your dipladenia?
You’re not alone! Here are answers to the most common concerns—from timing to troubleshooting—so you can keep your plant thriving and blooming year-round.
When is the best time to prune dipladenia for continuous blooms?
Prune your dipladenia three times a year: early spring (to shape and encourage new growth), mid-summer (after the first flush of blooms), and late fall (to clean up and prep for winter). Avoid heavy pruning in winter—focus on light maintenance to avoid stressing the plant.
Can I prune dipladenia while it’s flowering?
Yes, but strategically! Light trimming (like deadheading spent blooms) is fine during flowering to encourage more blooms. However, avoid heavy pruning—wait until after a bloom cycle to shape or reduce size. This prevents shocking the plant and losing flowers.
What should I do if my dipladenia looks leggy after pruning?
Leggy growth happens when your plant stretches for light. To fix it: move it to brighter, indirect light and prune just above a leaf node (where new growth emerges) to encourage bushier growth. Fertilize lightly with a balanced, water-soluble fertilizer to support recovery.
How much can I cut back dipladenia without harming it?
Dipladenia is resilient! You can reduce it by up to 1/3 of its size in a single pruning session, but avoid cutting more than that at once. For severe overgrowth, space out pruning sessions 4–6 weeks apart. Always use sterilized shears to prevent disease.
What do I do if my dipladenia doesn’t bloom after pruning?
No blooms? Check these fixes: Ensure it gets 4–6 hours of sunlight daily, fertilize every 4–6 weeks with a bloom booster, and avoid overwatering (let soil dry slightly between waterings). If it’s still struggling, prune back harder to stimulate new growth—sometimes a reset helps!
Can I propagate dipladenia from pruned cuttings?
Take 4–6 inch cuttings
from healthy stems (just below a leaf node), dip in rooting hormone, and plant in well-draining soil. Keep them warm and humid (use a plastic bag or propagator) until roots form (4–6 weeks). Perfect way to multiply your dipladenia for free!
Wrapping up and next steps
Mastering the art of dipladenia plant pruning is your ticket to vibrant, year-round blooms that keep your garden buzzing with life! 🌸 With just three seasonal trims—spring, summer, and fall—you’ll encourage healthier growth, fuller foliage, and those stunning flowers you adore.
Remember, the key is to prune with purpose: deadhead regularly, shape wisely, and never fear a little boldness!
Ready to transform your dipladenia into a showstopper? Grab your shears, review your tools, and get pruning—your plant (and future neighbors!) will thank you. Happy gardening! ✂️🌿