Planting
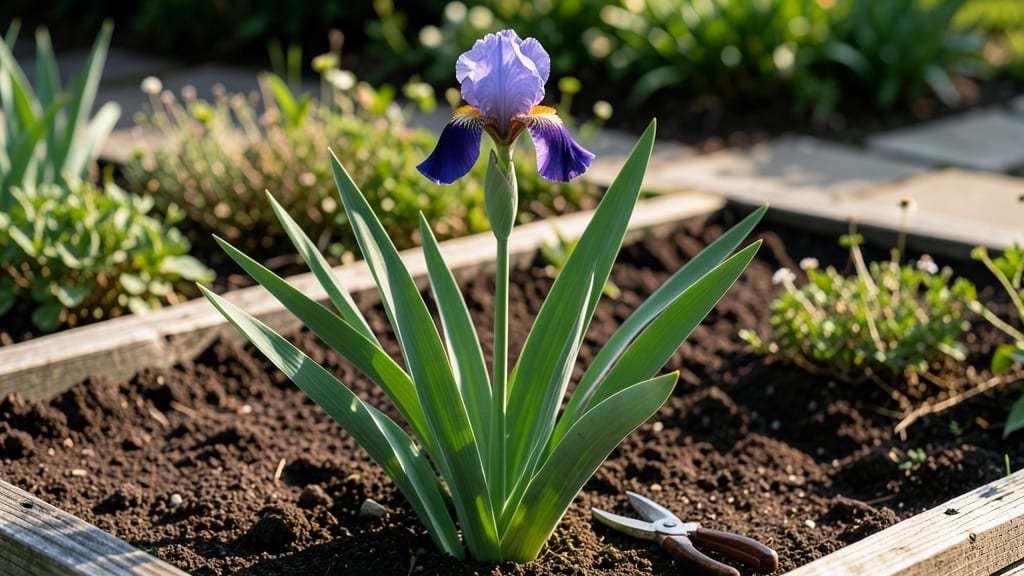
Growing large iris plants means adding vertical drama to your garden—tall, sword-like foliage paired with blooms that seem to glow from within. ✨ I’ve watched my own iris clumps double in size every three years, and the secret lies in the right soil, sunlight, and a little patience with their stubborn roots.
The key to happy irises starts with well-draining soil—think sandy loam mixed with compost—and a spot where they’ll get six to eight hours of full sun daily. Space them 2 to 3 feet apart so their rhizomes (those thick, fleshy roots) have room to spread without crowding.
Overwatering is their downfall, so let the soil dry out between waterings once established.
Pruning isn’t just about tidiness—it’s about encouraging bigger blooms next season. After the foliage turns yellow in late summer, cut it back by a third, leaving the new growth to store energy for spring.
With proper care, you’ll see sturdy stems reaching 3 to 4 feet tall, each topped with 3 to 5 inches of velvety petals in shades of purple, blue, or even golden yellow.
These plants thrive in zones 3 through 9, making them versatile for cool climates or mild winters. Just avoid heavy clay soils, and you’ll have irises that multiply effortlessly—year after year.
📚 In This Guide
- What you need
- Instructions
- Tips and common mistakes
- Wrapping up and next steps
What you need
- ● Large iris rhizomes or bulbs: Choose healthy, firm rhizomes (2–4 inches long) or bulbs with intact roots. Quantity: 3–5 per cluster for a full look.
- ● Well-draining soil: A mix of 60% garden soil, 30% compost, and 10% coarse sand or perlite (irises hate soggy roots!).
- ○ Organic fertilizer: A balanced 10-10-10 or 5-10-10 formula (low nitrogen to encourage blooms). Optional: Bone meal for phosphorus boost.
- ● Mulch: 3–4 inches of pine bark, straw, or wood chips (keep it away from the rhizome crown).
- ● Garden trowel or spade (for digging)
- ● Pruning shears (to trim dead foliage)
- ● Garden gloves (rhizomes can be sharp!)
- ● Watering can or hose with gentle nozzle
- ● Measuring tape or ruler (to space rhizomes 12–24 inches apart)
- ○ Optional: Plant labels (to track varieties) or landscape fabric (to suppress weeds).
- ● Sunlight: A spot with full sun (6+ hours daily)—irises thrive in bright light!
- ● Drainage: Avoid low-lying areas where water pools. Raised beds or slopes work best.
- ● Timing: Plant rhizomes in early fall (6–8 weeks before frost) or late winter (before new growth starts).
- ● Patience: Large irises take 2–3 years to reach full bloom potential!
How to grow large, stunning iris plants that bloom year after year
Here’s how I grow irises that reach their full, majestic height with vibrant blooms—no guesswork involved.
🌱 Step 1: Choose the Right Location and Prepare the Soil
Iris thrives in full sun—at least 6 hours daily—so pick a spot where they’ll get morning light and afternoon warmth. Avoid low-lying areas where water pools, as soggy soil invites rot. The ideal soil is well-draining, slightly alkaline (pH 6.0-7.0), and rich in organic matter.
Use a garden fork to loosen the soil to a depth of 12 inches, breaking up any compacted layers. Mix in 2-3 inches of compost or aged manure to improve fertility. If your soil is heavy clay, blend in sand or perlite to help water drain. Test the soil’s pH—if it’s too acidic, sprinkle wood ash or lime according to package instructions.
🪴 Step 2: Plant Rhizomes at the Correct Depth and Spacing
Irises grow from rhizomes, not bulbs, and planting depth is critical. Position each rhizome so the top is just visible above the soil—never buried. Push it into the soil until it’s firmly seated but not deep. Planting too deep suffocates the rhizome, while burying it completely kills the plant.
Space rhizomes 12-24 inches apart, depending on the variety. Larger irises need more room to spread. After planting, water lightly to settle the soil around the rhizomes. Avoid heavy watering—it can wash them deeper into the ground. Mulch with 2-3 inches of gravel or coarse sand (not organic mulch) to keep rhizomes dry and prevent rot.
☀️ Step 3: Water and Fertilize for Strong, Healthy Growth
Irises are drought-tolerant once established, but they need consistent moisture during their first growing season. Water deeply once a week, soaking the soil 6 inches down. Let the top 2 inches dry out between waterings—this prevents fungal diseases. After blooming, reduce watering to encourage dormancy.
Fertilize in early spring with a balanced, low-nitrogen fertilizer (like 5-10-10). Apply it 2-3 inches away from the rhizomes to avoid burning the roots. I skip fertilizer after mid-summer—too much late-season feeding promotes weak growth and fewer blooms next year.
✂️ Step 4: Deadhead and Divide for Long-Term Vigorous Blooms
After flowers fade, snip the spent blooms but leave the leaves intact—they feed the rhizome for next year’s blooms. If you see yellowing leaves in late summer, it’s a sign the plant is going dormant. At this point, cut back the foliage by half but leave some leaves until they turn brown naturally.
Every 3-5 years, divide crowded clumps in early spring or fall. Dig up rhizomes, separate the smaller ones, and replant them. Discard any that are soft, mushy, or shriveled—these are diseased or dead. Replant healthy divisions in fresh soil, and you’ll see bigger, fuller blooms within a season.
⏰ Step 5: Protect and Maintain Through Seasons
Irises are hardy but need winter protection in colder climates. Once foliage turns brown, cut it back to 2 inches and cover the area with 4-6 inches of mulch (like straw or leaves). Remove the mulch in early spring before new growth appears.
Watch for iris borers—tiny pests that tunnel into rhizomes. If you see sawdust-like frass or chewed leaves, treat with neem oil or beneficial nematodes. Healthy irises rarely need pesticides, but early intervention prevents damage. With proper care, your irises will bloom for decades, growing taller and more dramatic each year.
Tips & tricks for perfect large iris plants
A few simple strategies that'll help your irises grow taller and bloom more dramatically than ever.
The Sunlight Secret: Those 6 hours of sunlight are non-negotiable, but here's the thing: morning sun is more important than afternoon. If you're in a hot climate, afternoon shade can prevent leaf scorch while still giving you that critical sunlight. I've seen irises in full afternoon sun get crispy edges—trust me, it's not pretty.
Soil Preparation Tip: When loosening that 12-inch depth of soil, don't just stab the fork in and pull out—work it like you're fluffing a pillow. Break up all those compacted layers so roots can spread freely. I like to add a handful of wood ash to the bottom of each hole before planting to give that extra pH boost right where the rhizomes will be.
Planting Depth Visual: The top of the rhizome should be just barely visible above soil level—think of it like a pancake sitting on a plate. If you bury it even an inch too deep, you're essentially suffocating your plant. I use a toothpick to mark the soil level before planting as a quick reference. This is the #1 mistake I see beginners make.
Watering Wisdom: That once-a-week deep watering (6 inches down) is perfect, but here's what nobody tells you—water in the morning. Evening watering can lead to fungal issues, especially in humid climates. I set my timer for 7 AM and let the soil dry out those top 2 inches between waterings—it makes all the difference in preventing rot.
Pro Tips for Large Iris Plant
- A few simple strategies that'll help your irises grow taller and bloom more dramatically than ever.
- The Sunlight Secret: Those 6 hours of sunlight are non-negotiable, but here's the thing: morning sun is more importan...
- Soil Preparation Tip: When loosening that 12-inch depth of soil, don't just stab the fork in and pull out—work it lik...
Frequently asked questions
Got questions about growing and caring for large iris plants? You’re not alone! Here are some of the most common queries—plus quick, practical answers to keep your towering beauties thriving.
How do I know if my large iris plant is healthy?
A healthy iris has sturdy, upright stems and glossy, sword-like leaves that aren’t yellowing or mushy. Check for no signs of pests (like iris borers) or fungal spots. If leaves are brown at the tips but firm, it’s likely just natural aging—not a problem!
When is the best time to plant large iris rhizomes?
Plant them in early fall (6–8 weeks before frost) or late winter/early spring (as soon as the soil is workable). Avoid planting in summer heat—rhizomes need time to establish roots before extreme temperatures. Pro tip: Don’t bury them too deep! They should sit half-exposed above soil.
Why aren’t my iris blooms as vibrant as last year?
Fading blooms often mean overcrowding or poor nutrition. Dig up and divide clumps every 3–4 years to refresh growth. Feed with low-nitrogen, high-phosphorus fertilizer in early spring. Too much shade or wet soil can also dull colors—aim for full sun (6+ hours/day).
What’s the best way to protect iris plants from pests?
Iris borers are the #1 enemy! Remove and destroy infested leaves immediately. Apply neem oil or insecticidal soap as a preventative spray in spring. For slugs/snails, use copper barriers or diatomaceous earth. Healthy plants resist pests better—so mulch lightly and water at the base!
Can I grow large iris in containers? If so, what’s the trick?
Yes! Use a wide, shallow container with drainage holes and a mix of sandy loam + compost. Plant rhizomes half-buried and water moderately—they hate soggy roots. Move pots to full sun and divide every 2–3 years to prevent overcrowding. Dwarf varieties (like ‘Florentina’) adapt best!
Do large iris plants need winter care?
Most varieties are hardy to USDA Zone 3–9, but mulch lightly (2–3 inches) in cold climates to protect rhizomes. Cut back dead foliage in late fall but leave some leaves until spring—they photosynthesize even in winter! In Zone 10+, provide light shade during peak summer heat.
Wrapping up and next steps
Adding a large iris plant to your garden is a fantastic way to bring drama, color, and low-maintenance beauty to your outdoor space. Whether you're drawn to their striking blooms or their hardy nature, these plants reward gardeners with season-long elegance and minimal fuss.
Now that you’re equipped with the right knowledge—from soil prep to troubleshooting—it’s time to roll up your sleeves and plant!
🌱 Next steps:
- Pick your favorite iris varieties (bearded, Siberian, or Japanese) based on your climate and style.
- Mark your calendar for early spring or fall planting—ideal times for root establishment.
- Grab your gloves, a trowel, and a sunny spot, then watch your garden transform with bold, towering blooms!
You’ve got this! 🌿 With a little care, your large iris will thrive and become the star of your landscape. Happy gardening!