Shrubs
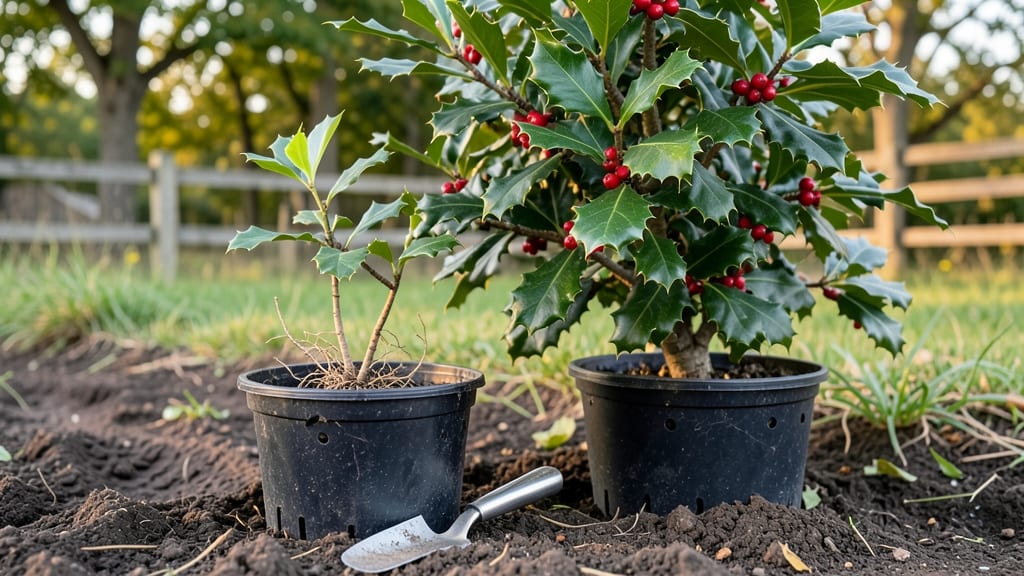
Planting holly bushes delivers fast-growing privacy in just two seasons—no waiting years for a thick screen. I learned the hard way that holly roots spread aggressively when planted right, but too many gardeners sabotage their own screens by ignoring soil prep or spacing.
The key is timing, soil, and knowing exactly where to place each plant so they fill in quickly without crowding.
Start with bare-root or container-grown bushes from reputable nurseries—avoid leggy specimens with yellowing leaves. Amend your soil with compost if it’s heavy clay or sandy, and dig holes twice as wide as the root ball but only as deep.
Holly thrives in partial sun, so pick a spot that gets 4-6 hours of morning light to prevent scorched leaves. Spacing matters too: 6-8 feet apart for standard bushes, wider for dwarf varieties.
After planting, water deeply to settle the soil, then mulch with 2-3 inches of shredded bark to retain moisture and block weeds. The first year is critical—keep soil evenly moist but not soggy, and avoid heavy pruning until established.
By year two, you’ll see dense, glossy foliage with those signature red berries, and neighbors will be asking for your secret. The best part? Holly stays evergreen all winter, so your privacy screen never takes a break.
This method works across zones 5-9, though southern climates need afternoon shade to prevent leaf burn. For faster results, plant in early spring or fall when roots can establish before extreme heat or cold.
Once planted, holly needs minimal care—just annual pruning to shape and occasional fertilizer in early spring. Your year-round screen will outlast cheap fences and look better too.
📚 In This Guide
- What you need
- Instructions
- Tips and common mistakes
- Wrapping up and next steps
What you need
- ● Holly bushes: 2–5 plants (depending on desired spacing and screen height). Choose between: American holly (Ilex opaca) – Classic, spiny leaves, bright red berries (female plants only produce berries).
- ● English holly (Ilex aquifolium) – Dark green, glossy leaves, fewer thorns, great for hedges.
- ● Dwarf varieties (e.g., 'Sky Pencil' or 'Little Gem') – Compact, ideal for small spaces.
- ● High-quality potting soil or native soil mix: 1–2 cubic yards (for in-ground planting) or 1–2 bags (for containers).
- ● Organic mulch: 2–3 inches of pine straw, wood chips, or shredded leaves (to retain moisture and suppress weeds).
- ● Slow-release fertilizer: 10-10-10 or 12-12-12 (follow package instructions for application rates).
- ● Watering can or hose with a gentle spray nozzle (for post-planting hydration).
- ● Garden shovel or spade (for digging holes).
- ● Garden trowel (for loosening roots and backfilling soil).
- ● Measuring tape or ruler (to ensure proper spacing—typically 6–10 feet apart for full-sized hollies, 3–5 feet for dwarf varieties).
- ● Garden gloves (hollies have sharp spines—protect your hands!).
- ● Pruning shears (for trimming roots if pot-bound or shaping after planting).
- ● Wheelbarrow or bucket (for mixing soil amendments or moving mulch).
- ● Soil amendments: Compost or peat moss (to improve drainage in heavy clay soil).
- ● Epsom salt (1 tbsp per plant annually for magnesium-rich foliage).
- ● Plant stakes or trellis (for young hollies in windy areas).
- ● Drip irrigation system (for consistent moisture, especially in dry climates).
- ● Bird netting (to protect berries from wildlife if desired).
Instructions for planting holly bushes with fast root establishment
Here’s how to get your holly bushes rooted quickly and thriving for a dense, evergreen privacy screen.
Prepare the Planting Site for Optimal Drainage
Holly bushes demand well-draining soil to prevent root rot, so choose a location with natural slope or amend heavy clay. Work in 2-3 inches of compost into the top 12 inches of native soil—this improves aeration while retaining moisture. Test the site by digging a 12-inch deep hole; if water pools after 30 minutes, raise the planting area by amending with sand or expanded shale until drainage improves.
Here’s the thing—holly roots spread aggressively but shallowly, so avoid compacted soil. If your yard has a thatch layer (dead grass roots), slice through it with a spade before planting. This ensures roots can access nutrients and water without suffocating.
Dig Holes and Position Bushes for Symmetry
For 4 holly bushes spaced 8-10 feet apart, dig holes twice as wide as the root ball but no deeper. This prevents burying the trunk too deeply, which can cause rot. Gently loosen the roots of container-grown bushes by teasing apart any circling roots—this encourages outward growth instead of girdling.
Position bushes so their trunks align with the center of the hole. Step back and visualize the final screen: holly grows 10-15 feet tall and wide, so stagger rows if planting multiple lines for a staggered, natural look. Water each hole deeply before placing the bush to settle the soil.
Plant and Backfill with Native Soil Mix
Place the holly bush in the hole, ensuring the top of the root ball sits 1 inch above ground level. This prevents settling from heavy rain. Fill the hole with a 50/50 mix of native soil and compost, tamping gently as you go to eliminate air pockets. Avoid compacting too firmly—roots need loose soil to expand.
Water immediately after planting to encourage root contact with the soil. Use 2-3 gallons per bush to settle the mix and eliminate air gaps. Mulch with 2-3 inches of wood chips, keeping it 6 inches away from the trunk to prevent moisture buildup that causes rot.
Water Deeply and Monitor for First Signs of Growth
For the first 2 weeks, water deeply every 3-4 days until the soil is 6 inches moist. Holly roots establish quickly in loose soil but dry out fast in containers. After planting, check soil moisture by inserting a finger 2 inches deep—if dry, water again. Avoid overhead sprinkling, which can spread disease.
You’ll see success when new growth appears in 4-6 weeks. Healthy holly leaves are dark green, glossy, and firm—wilting or yellowing signals overwatering or poor drainage. Fertilize lightly with a slow-release, balanced fertilizer (10-10-10) in early spring to support root development without burning tender new growth.
Prune Strategically for Shape and Density
Wait 6-8 weeks before pruning to let the bush establish. Then, trim back any leggy or crossing branches to encourage bushier growth. Holly responds well to light pruning in late winter, so shape the plant in early spring before new shoots emerge. Remove no more than 25% of the foliage in a single season to avoid stress.
Real talk: Holly bushes grow slowly at first but reward patience with dense, glossy foliage. By year 3, your screen will fill in completely. If birds strip berries, cover with fine netting—this preserves fruit for wildlife while maintaining your privacy.
Tips & tricks for planting holly bushes with fast root establishment
Fast root establishment is all about preparation and precision—here’s how to ensure your holly bushes take hold quickly and grow into a lush, year-round privacy screen.
Soil Preparation Secret: In Step 1, when testing drainage by digging that 12-inch deep hole, I recommend adding a handful of perlite or coarse sand to the backfill mix if your native soil is particularly dense. This creates tiny air pockets that holly roots love, accelerating establishment. The 30-minute water test is critical—if water lingers, you’re risking root suffocation, which can set your bushes back for months.
Root Ball Handling Technique: For container-grown bushes in Step 2, don’t just pull them out of the pot—gently squeeze the sides to loosen the root ball first. I’ve seen too many holly bushes fail because circling roots were left intact, strangling the plant’s own growth. If you notice any roots growing in tight circles, use your fingers to carefully tease them apart before planting. This simple step can double your success rate with container-grown specimens.
Watering Strategy: The 2-3 gallons per bush recommendation in Step 3 is non-negotiable, but here’s the pro move: split that water into two applications. Pour half immediately after planting, then wait 10 minutes to let the soil settle before adding the rest. This prevents soil compaction around the roots while ensuring complete saturation. After the initial watering, maintain that 6-inch moisture depth by checking with your finger—if the top 2 inches feel dry, it’s time to water again.
Pruning Timing: Waiting the full 6-8 weeks before pruning in Step 5 is crucial, but don’t wait until you see visible stress signs. Holly bushes establish new growth from old wood, so any pruning too soon can remove potential growth points. If you’re impatient and notice leggy growth before 6 weeks, simply trim back the tips by about 1/3—this encourages branching without compromising the plant’s ability to establish roots quickly.
Pro Tips for Planting Holly Bushes
- Fast root establishment is all about preparation and precision—here’s how to ensure your holly bushes take hold quick...
- Soil Preparation Secret: In Step 1, when testing drainage by digging that 12-inch deep hole, I recommend adding a han...
- Root Ball Handling Technique: For container-grown bushes in Step 2, don’t just pull them out of the pot—gently squeez...
Frequently asked questions
Got questions about planting holly bushes? You’re not alone—these evergreens are popular but can raise a few common concerns! Here’s what you need to know before digging in.
When is the best time to plant holly bushes?
The ideal times are early spring (after the last frost) or fall (6–8 weeks before the first frost). These windows give roots time to establish before extreme heat or cold. Avoid planting in summer’s scorching heat or winter’s frozen ground.
How far apart should I space holly bushes for a privacy screen?
Spacing depends on the variety, but most holly bushes need 6–10 feet apart for full growth. Check the mature height/width on the tag—dwarf varieties (like Ilex ‘Dwarf Burford’) can go 3–5 feet apart. Tighter spacing = faster privacy, but expect pruning later!
Can I plant holly bushes in full shade? Will they survive?
Holly bushes thrive in partial shade to full sun, but too much shade (especially dense, dry shade) can weaken growth and reduce berries. Aim for at least 4–6 hours of sunlight daily. If shade is unavoidable, choose shade-tolerant varieties like ‘Blue Princess’ or ‘Nellie R. Stevens’.
What pests or diseases should I watch for after planting?
Holly bushes are generally tough, but keep an eye out for scale insects, spider mites, or holly leaf miner. Yellowing leaves or sticky residue? Spray with horticultural oil. Root rot can occur in soggy soil—ensure proper drainage. Prune affected branches promptly and maintain airflow.
Are there low-maintenance holly alternatives for privacy screens?
Yes! If holly’s berries or thorns aren’t your style, try boxwood (dense, evergreen), arborvitae (fast-growing, deer-resistant), or cherry laurel (glossy leaves, fragrant). Just note: None offer holly’s year-round color or wildlife appeal!
Wrapping up and next steps
Planting holly bushes is a rewarding way to add year-round beauty, privacy, and wildlife-friendly charm to your landscape. With the right soil, spacing, and care, these resilient shrubs will thrive for decades—offering glossy leaves, striking berries, and a touch of holiday magic all year long! 🌿✨
Ready to get started? Mark your calendar for early spring or fall planting, gather your supplies, and take the first step toward a lush, evergreen haven. Your future self—and your birds—will thank you!
- Pro tip: Snap a photo of your planting spot for reference as you prep!