How To
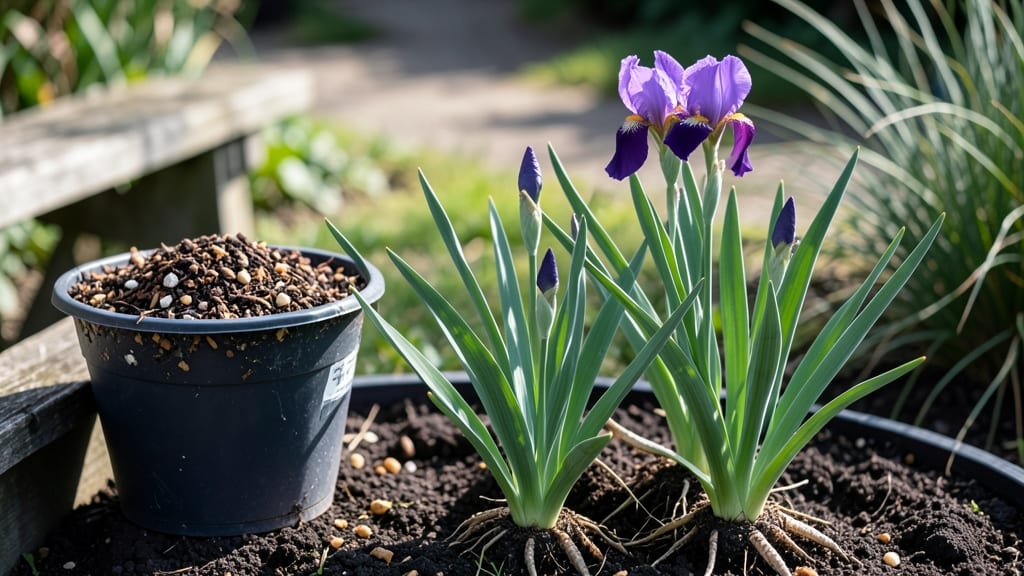
Planting iris tubers in early spring unlocks those bold, velvety blooms before summer even begins. 🌸 I’ve dug up clumps of iris that were barely planted three years ago—still thriving, still throwing up sword-like leaves and dramatic flowers every season.
The secret isn’t complicated, but timing and soil matter more than most beginners realize.
You’ll need a sunny spot with well-draining soil—iris roots rot faster than they bloom in soggy ground. Divide your tubers before planting (yes, even if they look perfect), then tuck them into the soil with the top third exposed.
Spacing them 12 inches apart gives them room to spread, and planting them at the right depth means fewer floppy stems later. Most mistakes happen here: too deep, too shallow, or planting in heavy clay.
By mid-summer, you’ll see those signature iris leaves pushing through the soil, and next spring, the blooms will arrive like clockwork. The flowers stay vibrant for weeks, and the plants multiply every year—just dig up the extras in late summer to share or replant.
This is one of those plants that rewards patience with jaw-dropping color.
Works in zones 3 through 9, whether you’re lining a border, brightening a slope, or just adding drama to a sunny patch. Let’s get those tubers in the ground so you can enjoy the show next year.
📚 In This Guide
- What you need
- Instructions
- Tips and common mistakes
- Wrapping up and next steps
What you need
- ● Iris tubers: Healthy, firm, and disease-free rhizomes (check for plump, unblemished roots). Quantity: 3–5 per square foot for a lush display.
- ● Well-draining soil: Mix of garden soil, sand, or compost (aim for a pH of 6.0–7.0). Tip: Avoid heavy clay!
- ● Organic fertilizer: Balanced 10-10-10 or slow-release granules (1–2 tbsp per plant).
- ● Mulch: Pine bark, straw, or shredded leaves (2–3 inches thick).
- ● Watering can or hose: With a gentle spray nozzle.
- ● Garden trowel or spade: For digging trenches (6-inch depth).
- ● Pruning shears: To trim old foliage or roots.
- ● Gloves: Heavy-duty for handling rhizomes.
- ○ Ruler or measuring tape: (Optional) To space tubers evenly (12–24 inches apart).
- ● Soil test kit: To check pH and nutrient levels.
- ● Epsom salt: (1 tbsp per plant) for magnesium boost.
- ● Drip irrigation system: For consistent moisture.
Step-by-step instructions for planting iris tubers
Here's the straightforward method I use every spring to get vibrant iris blooms with minimal fuss.
🌱 Step 1: Prepare the Planting Site
Choose a spot with full sun exposure—at least 6 hours of direct sunlight daily. Iris thrives in well-draining soil, so avoid low-lying areas where water pools. If your soil is heavy clay, mix in 2-3 inches of coarse sand or perlite to improve drainage.
Loosen the soil to a depth of 12 inches using a garden fork or tiller. This helps roots spread easily without resistance. I like to work in a small mound of soil about 6 inches high—this keeps the rhizomes (the thick, fleshy stems) slightly exposed after planting, which prevents rot.
🪴 Step 2: Position and Plant the Tubers
Handle iris tubers gently—they bruise easily. Place each tuber with the top half exposed (about 1/3 of the tuber showing) and the roots fanning downward. The growing tip (a small bump) should face upward. Space tubers 12-18 inches apart in rows, leaving 2-3 feet between rows for easy maintenance.
Cover the roots lightly with soil, but leave the top of the tuber exposed. This ensures the tuber stays dry and prevents rot. Press the soil gently around the roots to secure them without compacting it too tightly. Water lightly after planting to settle the soil, but avoid soaking the tubers.
☀️ Step 3: Mulch and Maintain Through the Season
Spread a 1-inch layer of mulch around the base of the plants, keeping it 2 inches away from the tubers to prevent moisture buildup. I use shredded bark or straw mulch, which allows water to drain while suppressing weeds. Mulch also helps regulate soil temperature, which is especially important in hot climates.
Water deeply once a week during the first growing season, focusing on the soil around the roots rather than the tubers themselves. You’ll know you’ve watered enough when the soil feels moist 2 inches below the surface. Once established, iris is drought-tolerant, so reduce watering to every 2-3 weeks unless your area experiences extreme heat or drought.
Watch for new growth in early spring—thin, grass-like leaves indicate the tubers are waking up. By mid-spring, you should see flower stalks emerging. These can be left to bloom or removed to encourage stronger root development if you prefer lush foliage over flowers.
Tips & tricks for planting iris tubers
Here's what I've learned over years of planting iris—these little details make all the difference between healthy blooms and struggling plants.
Sunlight is non-negotiable: That 6 hours of daily sun is critical, but don't stop there. If your garden gets afternoon shade, plant irises on the north side of obstacles to catch morning sunlight. I've seen tubers planted in partial shade produce half as many blooms—it's worth moving them if needed. Remember, irises are sun worshippers!
Soil prep matters more than you think: The 12-inch depth for loosening soil might seem excessive, but trust me on this. Iris roots need room to spread horizontally, not just downward. I make it a habit to add a handful of compost to the bottom of each planting hole—this gives roots a nutrient boost right where they'll grow most actively.
Positioning those tubers right: When planting, visualize the tuber like a clock face. The growing tip (that little bump) should point to 12 o'clock, facing upward. The roots should fan out like clock hands toward 6 o'clock. I mark this with a pencil on the tuber if I'm unsure—it prevents confusion when handling multiple tubers. That 1/3 exposure is crucial too; if you bury them too deep, they'll rot.
Watering wisdom: The 2-inch moisture check is your friend. Use your finger to test soil moisture—it should feel damp but not soggy. I've learned this the hard way: overwatering is the #1 killer of new iris plants. After the initial light watering, let the soil dry slightly between waterings. Mulch helps here by slowing evaporation, but keep it clear of the exposed tuber tops.
Pro Tips for Planting Iris Tubers
- Here's what I've learned over years of planting iris—these little details make all the difference between healthy blo...
- Sunlight is non-negotiable: That 6 hours of daily sun is critical, but don't stop there. If your garden gets afternoo...
- Soil prep matters more than you think: The 12-inch depth for loosening soil might seem excessive, but trust me on thi...
Frequently asked questions
Got questions about planting iris tubers? You’re not alone! Here are some of the most common concerns—and their answers—to help you grow a stunning iris garden with confidence.
When is the best time to plant iris tubers?
Plant iris tubers in early fall (6–8 weeks before the first frost) or late winter/early spring (after the soil warms up). Fall planting gives roots time to establish before winter, while spring planting works in milder climates. Avoid planting in extreme heat or freezing soil!
Can I plant iris tubers in winter?
It’s not ideal—unless you’re in a frost-free zone. Cold soil can stunt root growth or even kill tubers. If you must plant in winter, use mulch or a cold frame to protect them until spring. Wait until the ground thaws and warms slightly (above 50°F/10°C) for best results.
How often should I divide and replant iris tubers?
Divide iris tubers every 3–5 years to prevent overcrowding and boost blooms. Look for fan-shaped rhizomes with 3–5 leaves—these are the best candidates for replanting. Spring or fall are the best times, but avoid dividing right after planting or during extreme weather.
What if my iris tubers rot after planting?
Rot usually means too much moisture or poor drainage. Ensure tubers are planted in well-draining soil (mix in sand or perlite if needed) and never bury them too deep—just 1/3 of the rhizome should be covered. If rot occurs, trim healthy parts and replant in drier soil.
Can I grow irises in containers instead of the ground?
Use a large container (at least 12 inches deep) with fast-draining potting mix. Place tubers near the edge (not buried deep) and water sparingly. Containers let you move irises to sunny spots or protect them from harsh winters. Just ensure they get at least 6 hours of sunlight daily.
Wrapping up and next steps
Planting iris tubers is a rewarding way to bring vibrant blooms to your garden with minimal effort! 🌸 By choosing the right tubers, preparing the soil properly, and spacing them correctly, you’ll set the stage for stunning spring displays.
With just a little patience, your hard work will pay off in bold colors and lush foliage.
Ready to get started? Grab your gloves and dig in! Check out our garden care guide for more tips on maintaining your iris plants after planting. Happy gardening! 🌱