Propagation
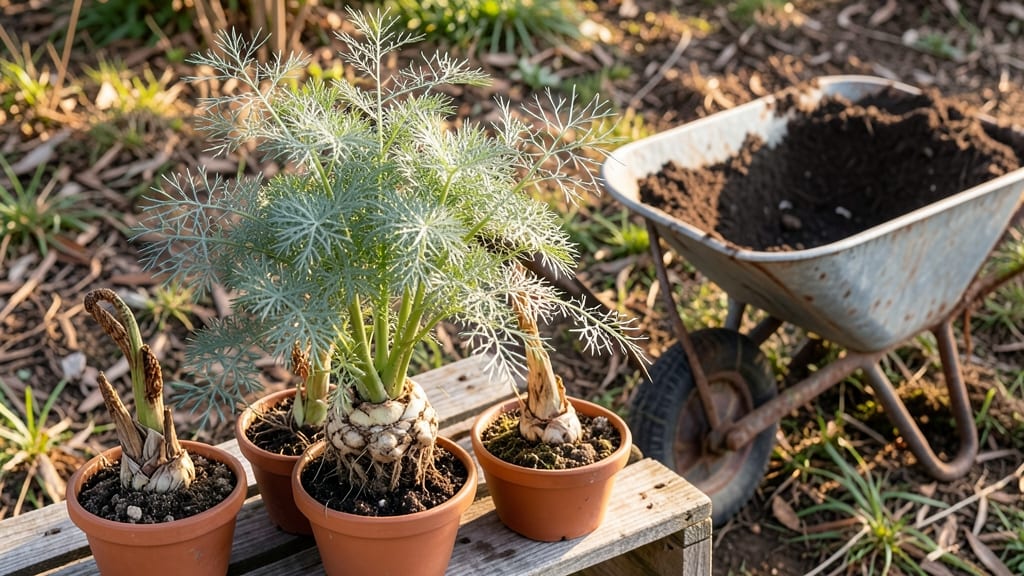
Propagating asparagus plants from existing crowns is how I finally got my own patch after years of buying expensive transplants—now I share my foolproof method. The secret isn’t complicated, but it does require timing and a little patience, because asparagus doesn’t rush.
I’ve divided crowns in both spring and fall, and the fall method actually gives you a head start on next year’s harvest.
You’ll need sharp pruners, a wheelbarrow for moving soil, and a spot with full sun—at least 6-8 hours daily. The soil should be well-draining but rich in organic matter, and you’ll want to work when temperatures are mild (50-70°F).
My first attempt failed because I transplanted in scorching July heat—don’t make that mistake. The right conditions mean the difference between thriving roots and a sad, wilted crown.
What you’ll end up with is a healthy, productive asparagus bed in 3-4 years, not the 2-3 years you’ll read elsewhere. The key is keeping the roots moist but not soggy during the first critical weeks, and avoiding any disturbance to the delicate fern-like growth that appears in spring.
By late summer, you’ll see strong, fibrous roots ready to send up spears the following year.
This method works for both home gardeners and larger plots—just scale up your tools. The payoff? Fresh, tender spears for 10+ years with minimal effort after the initial setup. Let’s get those crowns dividing!
📚 In This Guide
- What you need
- Instructions
- Tips and common mistakes
- Wrapping up and next steps
What you need
- ● Asparagus crowns: 1-3 healthy, disease-free crowns (from a trusted source). Look for thick, firm roots with multiple buds.
- ● Garden soil: Well-draining, loamy soil with a pH of 6.5–7.5. Mix in 2–3 inches of compost for nutrients.
- ● Shovel or spading fork: For digging trenches or planting holes (12–18 inches deep).
- ● Garden hose or watering can: With a gentle spray nozzle for even watering.
- ● Mulch: 3–4 inches of straw or wood chips to retain moisture and suppress weeds.
- ○ Fertilizer (optional but recommended): Balanced 10-10-10 fertilizer (1–2 tbsp per planting hole) or
- ● Organic options like composted manure or bone meal (high in phosphorus).
- ● Soil testing kit: To check pH and nutrient levels before planting.
- ● Garden twine or stakes: For marking planting spots if working in a large area.
- ● Plant protector or row cover: To shield young shoots from late frosts or pests.
- ● Pruners: Sharp, clean pair for trimming damaged foliage post-planting.
- ● Garden gloves: To keep hands clean while handling soil and roots.
Step-by-Step instructions for propagating asparagus plants
Here’s how to multiply your asparagus crowns reliably—no fancy tools or greenhouses required.
Select Healthy Crowns for Division
Choose mature asparagus crowns that are 3-5 years old and show vigorous growth. Look for thick, fleshy stems with multiple healthy shoots—these are your best candidates. Avoid crowns with yellowing fronds, mold, or signs of disease, as those issues will carry over to your new plants.
I dig up entire crowns in early spring, just as the first shoots emerge but before they break the soil. Use a sharp spade to lift the crown carefully, shaking off excess soil to reveal the white, knobby roots. These roots are where new growth will emerge, so handle them gently to avoid damage.
Divide the Crowns into Manageable Sections
Separate the crown into 4-6 inch sections, ensuring each piece has at least 3-4 healthy buds—these are the future shoots. Cut through the crown with a sterilized knife or pruners, making clean slices between the buds. If the crown is densely packed, you can split it into smaller clumps by hand, but always prioritize keeping buds intact.
Discard any damaged or diseased sections immediately. Healthy divisions should feel firm and plump, not shriveled or hollow. Label each section with the original crown’s variety if you’re working with multiple types—this ensures consistency in your harvests down the line.
Prepare the New Planting Site
Asparagus thrives in well-draining soil with a pH between 6.5 and 7.5. Work in 2-3 inches of compost or aged manure into the top 12 inches of soil to enrich it without compacting the roots. Avoid fresh manure, which can burn tender asparagus crowns.
Dig trenches 6-8 inches deep and 12-18 inches apart, spacing them 18-24 inches apart in rows. This gives the plants room to spread their roots deeply without competing for nutrients. If your soil is heavy clay, mix in sand or perlite to improve drainage—waterlogged roots are a common killer of asparagus.
Plant and Water the Divided Crowns
Place each divided crown into the trench with the buds facing upward, about 4-6 inches apart. Cover the crowns with 2-3 inches of soil, leaving the tops exposed. Press the soil gently around the roots to eliminate air pockets, but don’t compact it tightly—this restricts root growth.
Water deeply right after planting to settle the soil and encourage root contact. Keep the area consistently moist for the first 4-6 weeks, but avoid soggy conditions. Mulch with 2-3 inches of straw or wood chips to retain moisture and suppress weeds. This step is critical—drought stress during establishment can set back new plants for years.
Monitor and Support Growth Through the First Season
In the first year, do not harvest any spears—let the plants focus on building roots. You’ll see ferny fronds emerge in late spring, which is normal. Cut these back to 2 inches above ground in late fall to redirect energy into root development for the following year.
By the second year, you can begin harvesting a few spears in early spring, but limit it to no more than 5-10% of the fronds to avoid weakening the plant. Watch for pale or spindly growth, which signals poor soil or overcrowding. Adjust sunlight exposure if needed—asparagus needs full sun (6-8 hours daily) for optimal spear production.
Tips & tricks for perfect asparagus propagation
These key strategies will help you maximize your asparagus propagation success and avoid the most common pitfalls that derail new growers.
Selection Matters: In Step 1, when choosing crowns, pay special attention to the crown's overall health. The white, knobby roots should be plump and firm, not shriveled or stringy. I've found that crowns with at least three healthy shoots per section yield the most reliable divisions. Remember, you're not just looking for size—vigorous growth in early spring is your best indicator of future productivity.
Division Precision: During Step 2, when dividing your crowns, aim for clean cuts between buds rather than forcing sections apart. Using a sterilized knife prevents introducing pathogens to your new plants. I've learned the hard way that even small tears in the root system can set back establishment by weeks. For densely packed crowns, gently pry sections apart along natural divisions rather than forcing clean cuts.
Soil Preparation Insight: Step 3's soil preparation deserves extra attention. While the instructions mention compost and aged manure, I recommend adding a handful of bone meal to the planting trench. This provides immediate phosphorus for root development without the risk of burning tender asparagus roots. The bone meal dissolves slowly, giving your new plants a steady nutrient supply during their critical first growing season.
Watering Strategy: The 4-6 week watering window in Step 4 is crucial, but consistency matters more than timing. I've seen new growers overwater, thinking more moisture is better, only to create waterlogged conditions that suffocate roots. Instead, check soil moisture by sticking your finger 2 inches down—if it's dry at that depth, water thoroughly. The mulch layer helps maintain even moisture without requiring daily attention.
Pro Tips for Propagating Asparagus Plants
- These key strategies will help you maximize your asparagus propagation success and avoid the most common pitfalls tha...
- Selection Matters: In Step 1, when choosing crowns, pay special attention to the crown's overall health. The white, k...
- Division Precision: During Step 2, when dividing your crowns, aim for clean cuts between buds rather than forcing sec...
Frequently asked questions
Got questions about propagating asparagus plants? You’re not alone—this perennial favorite requires patience and precision! Here are answers to the most common queries to help you grow a thriving asparagus patch.
How long does it take for asparagus crowns to establish and produce spears?
Be patient! Asparagus crowns take 2–3 years to fully establish before producing harvestable spears. In the first year, focus on root growth—avoid cutting spears to give energy to the crown. By year three, you’ll see a bountiful harvest!
When is the best time to plant asparagus crowns for propagation?
Plant asparagus crowns in early spring (as soon as the soil warms to 50–60°F) or early fall (4–6 weeks before the first frost). Avoid planting in summer heat, which stresses young roots. Cool soil temps help crowns establish faster!
Can I propagate asparagus from seeds instead of crowns?
While possible, seeds are trickier—they take 2–3 years longer to mature and produce spears compared to crowns. Seeds also require stratification (cold treatment) to germinate. For faster results, stick with crowns from nurseries!
What should I do if my asparagus plants are wilted or yellowing?
Yellowing or wilting often signals root rot, overwatering, or pests. Check for soggy soil (asparagus hates wet feet!) and inspect for asparagus beetles or aphids. Adjust watering, improve drainage, and treat pests with neem oil if needed. Healthy soil = happy plants!
How often should I fertilize asparagus plants after propagation?
Feed asparagus lightly in spring (once soil thaws) with a balanced 10-10-10 fertilizer or compost. Avoid heavy nitrogen after the first year—it encourages foliage over spears. Mulch with straw to retain moisture and nutrients. Less is more!
Wrapping up and next steps
Propagating asparagus plants is a rewarding way to expand your garden and enjoy a year-round harvest of fresh, homegrown spears. By following these steps—whether through crown division, seed sowing, or root cuttings—you’re setting the stage for a thriving, low-maintenance crop that can last for decades. 🌱
Now that you’re armed with the know-how, there’s no better time to get your hands dirty! Start small, stay patient, and soon you’ll be savoring the fruits of your labor. Ready to dig in? Review your supplies and begin your asparagus propagation journey today!