
Propagation
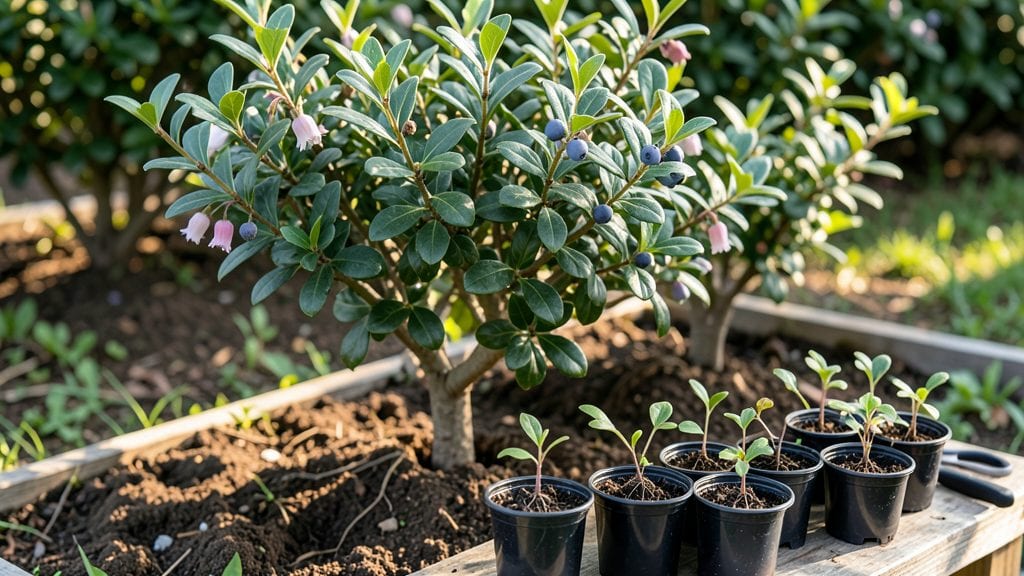
Blueberry propagation through layering is the secret weapon for expanding your bushes without buying expensive plants. 🌱 I’ve doubled my blueberry patch in just two seasons using this foolproof method—no green thumb required.
The key is timing the cut just right and keeping the new roots happy until they’re ready to strike out on their own.
You’ll need sharp pruning shears, rooting hormone (optional but helpful), and a mix of peat moss and perlite to keep moisture steady. The best time to layer is late spring or early summer when new growth is vigorous but not yet woody.
Most gardeners overcomplicate this—it’s really about patience and a little moisture control.
Within 8-12 weeks, you’ll see roots forming along the buried stem, and by next spring, you’ll have a self-sufficient plant ready to transplant.
The berries won’t be as heavy the first year, but the payoff comes in years two and three when you’ve got a thriving bush that’s all yours.
This method works for both lowbush and highbush varieties, and it’s especially great for gardeners with acidic soil challenges. No more struggling with bare-root plants—just cut, cover, and wait for nature to do the rest.
📚 In This Guide
- What you need
- Instructions
- Tips and common mistakes
- Wrapping up and next steps
What you need
- ● Healthy blueberry plant(s): Choose mature bushes (2+ years old) with vigorous, flexible stems (1/4" to 1/2" thick). Aim for at least 3-5 stems per plant for layering.
- ● Rooting hormone: A powder or gel (e.g., Clonex or Dip 'N Grow) to boost root development. 1 small bottle (4-8 oz) is plenty for beginners.
- ● Sharp pruning shears or knife: Sterilized to prevent disease. Clean with rubbing alcohol before and after use.
- ● Plastic or metal plant ties/clips: 3-6 per stem (e.g., twist ties, bent wire, or layering pins) to secure stems to the soil.
- ● Well-draining potting mix: A blend of 50% peat moss or coconut coir + 50% perlite or sand. 1-2 gallons per plant for layering beds.
- ● Containers or trenches: Option 1: Small pots (4-6" diameter) for individual stem layering.
- ● Option 2: Trench (6-8" deep, 12" wide) in a garden bed for multiple stems.
- ● Mulch: Straw or pine needles (2-3 inches thick) to retain moisture and protect new roots.
- ● Watering can or hose with gentle spray nozzle: For consistent moisture without over-saturating.
- ● Clear plastic bags or domes: To create a humidity tent (great for indoor layering).
- ● Fertilizer (low-nitrogen, high-phosphorus): Like 5-10-10 or fish emulsion to encourage root growth. Use half-strength after roots form.
- ● Grow lights or sunny windowsill: For indoor layering (if propagating in winter).
- ● Labeling tags: To track varieties and propagation dates.
Step-by-Step instructions for blueberry plant propagation
Here’s how to clone blueberries using simple layering—no fancy tools or expensive setups required.
🌱 Step 1: Select Healthy Branches for Layering
Choose 1-year-old wood from your existing blueberry bush—look for flexible, greenish-brown stems about the thickness of a pencil. Avoid woody, mature branches; they root poorly. I pick branches that are 12-18 inches long and have multiple leaf nodes (those little bumps where leaves grow). These nodes are where roots will form, so more nodes mean better success.
Gently bend a low-growing branch toward the ground, making sure it doesn’t snap. If it’s too stiff, you’ll need to loosen the soil around it first—blueberries hate disturbed roots, so work carefully. The goal is to create a gentle curve without breaking the stem.
🌿 Step 2: Create a Root-Inducing Wound
About 3-4 inches from the tip, make a small, shallow cut (about ¼ inch deep) on the underside of the stem with a clean, sharp knife. This wound triggers root growth by exposing the cambium layer—the plant’s growth tissue. Don’t slice too deep, or you’ll damage the stem and invite rot.
I like to use a sterilized razor blade for precision. Wipe the knife with rubbing alcohol between cuts to prevent spreading disease. Once you’ve made the cut, gently press the wounded area into the soil so it’s 1-2 inches deep. This ensures good contact with moisture and warmth, which speeds up rooting.
💧 Step 3: Secure and Monitor Moisture
Use a U-shaped bent wire or a bent paperclip to hold the wounded section in place against the soil. This keeps the stem stable while roots form. Water the area deeply but gently—blueberries dislike soggy soil, so aim for moist, not wet. You’ll know it’s right when water drains through in 10-15 minutes without pooling.
Cover the layered section with 2-3 inches of organic mulch (like shredded bark or pine needles) to retain moisture and protect the new roots. Check the soil every 2-3 days—it should feel like a wrung-out sponge. If it’s dry, water lightly; if it’s soggy, hold off until it dries slightly.
⏰ Step 4: Wait and Watch for Roots
Root growth can take 4-8 weeks, depending on warmth and humidity. You’ll know it’s working when you see tiny white roots forming at the wounded area or when the layered stem feels sturdier when tugged gently. I test by pulling very lightly—if it resists, roots are forming.
Once roots are 1-2 inches long (usually after 6-8 weeks), cut the stem just below the new roots with clean shears. Dig carefully to avoid damaging the new root system, then transplant the cutting to its own pot with well-draining soil. Keep it shaded for a week to reduce stress while it adjusts.
☀️ Step 5: Transition to Independent Growth
After transplanting, water deeply once a week (unless rain does it for you) and keep the soil consistently moist but never waterlogged. Blueberry cuttings need partial shade for the first month—think morning sun and afternoon shade. Gradually introduce more sunlight over 2-3 weeks to harden them off.
You’ll see new leaves in 4-6 weeks, signaling the cutting has fully rooted. Once established, fertilize lightly with an acid-loving plant mix to encourage fruiting. This method gives you 4-6 new plants from one bush—free and stress-free for your blueberries!
Tips & tricks for perfect blueberry plant propagation
A few simple tricks can make all the difference between success and frustration when propagating blueberries.
The Branch Selection Secret: In Step 1, look for branches that are slightly flexible—they’re the best candidates for rooting. I’ve found that branches with 3-5 leaf nodes tend to produce the most vigorous roots. If you’re unsure, bend the branch gently—if it snaps easily, it’s too mature; if it barely bends, it’s too young. Aim for that perfect pencil-thickness flexibility.
Cutting Precision Matters: When creating that root-inducing wound in Step 2, think of it like making a tiny smile on the underside of the stem. A ¼-inch deep cut is all you need—any deeper risks damaging the cambium layer. I’ve ruined several cuttings by going too deep, so take your time. Sterilizing your knife between cuts is non-negotiable; I use rubbing alcohol wipes to prevent any fungal issues that could derail your propagation.
Moisture Management Trick: The 10-15 minute drainage test in Step 3 is your best friend. After watering, stick your finger into the soil—it should feel damp but not soggy. I’ve learned the hard way that blueberries hate wet feet. If you’re unsure, err on the side of drier soil rather than soggy. The wrung-out sponge test every 2-3 days is your moisture gauge—adjust your watering based on how quickly it dries.
Root Growth Timeline: The 4-8 week rooting window can feel like forever, but there are clues to watch for. In Step 4, gently tug on the layered stem—if it resists slightly, roots are forming. I’ve had cuttings that showed roots in just 4 weeks during warm spring weather, while others took nearly 8 weeks in cooler conditions. Patience is key, but don’t let the process feel mysterious. Those tiny white roots are your reward for proper technique.
Pro Tips for Blueberry Plant Propagation
- A few simple tricks can make all the difference between success and frustration when propagating blueberries.
- The Branch Selection Secret: In Step 1, look for branches that are slightly flexible—they’re the best candidates for rooting.
- Cutting Precision Matters: When creating that root-inducing wound in Step 2, think of it like making a tiny smile on the underside of the stem.
Frequently asked questions
Got questions about propagating blueberries? You’re not alone! Here are some of the most common queries—and straightforward answers—to help you grow confidently.
When is the best time to propagate blueberries?
The ideal window is late spring to early summer (May–June in most zones) or early fall (September–October). This timing ensures mild weather and active root growth. Avoid extreme heat or frost—your cuttings need stability! For layering, spring is best since the plant is already pushing new growth.
Can I propagate blueberries from store-bought berries?
Nope! Store-bought blueberries are often treated to prevent sprouting, and even if they germinate, the resulting plants may not be true to the parent variety. Stick to organic, seed-bearing berries (if seed propagation) or use cuttings/layers from a healthy plant for reliable results.
Why aren’t my blueberry cuttings rooting?
Common culprits include low humidity (try a plastic bag or misting), poor moisture (keep soil damp but not soggy), or improper timing (weak growth in winter). Use a rooting hormone for a boost, and ensure your cuttings have 2–3 nodes—these are where roots form!
Do I need special soil for propagating blueberries?
Yes! Blueberries thrive in acidic, well-draining soil (pH 4.5–5.5). Mix 50% peat moss or coconut coir with 50% perlite/sand for cuttings. Avoid garden soil—it’s often too alkaline. For layers, bury the stem in the plant’s existing acidic bed for natural success.
How long until my propagated blueberry plant bears fruit?
Patience is key! Seedlings may take 3–5 years, while cuttings/layers can fruit in 1–3 years if given ideal conditions (sun, acid soil, and consistent water). Dwarf varieties often bear sooner—perfect for containers or small gardens!
Can I propagate blueberries from a friend’s plant?
Just ask for healthy, disease-free cuttings (6–8 inches long) or use the layering method directly from their bush. Avoid plants treated with pesticides—chemicals can stress your new propagation. A quick rinse won’t hurt, but organic is best!
Wrapping up and next steps
Mastering blueberry plant propagation through layering is a rewarding way to expand your garden without stressing your plants! Whether you're a beginner or a seasoned gardener, these techniques ensure healthy root growth and thriving bushes.
Now that you’re equipped with the right knowledge, roll up your sleeves and get growing—your future blueberry harvests will thank you! 🌱
Ready to take the next step? Start by selecting a few mature blueberry plants and try layering a branch this season. Keep a propagation journal to track progress, and soon, you’ll be sharing (or enjoying!) homegrown blueberries with friends and family. Happy gardening! 💙