Container Gardens
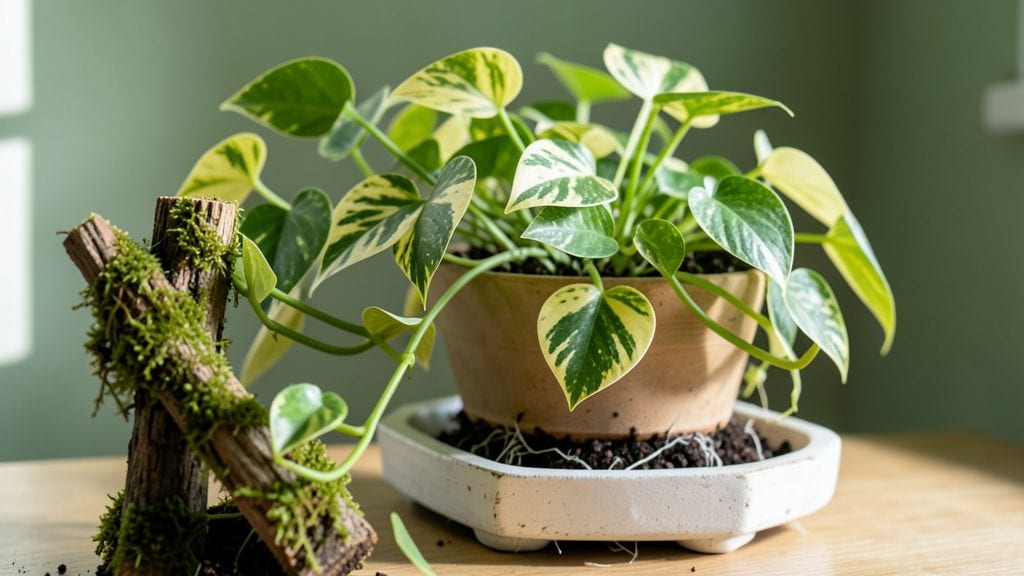
Transforming a corner of your home into a thriving indoor plant bed can turn even the tiniest apartment into a lush sanctuary. 🌿 I used to think green thumbs required a backyard, but my first vertical garden proved me wrong—now I’ve got a mini jungle in my living room that’s both functional and stunning.
The key is matching the right plants to your space: low-light varieties like pothos or snake plants thrive on shelves, while herbs and succulents need brighter spots near windows.
You’ll need lightweight containers with drainage holes, a sturdy mounting system (like wall planters or a DIY pallet bed), and a watering schedule that keeps roots happy without drowning them.
By the end, you’ll have a vertical garden that’s not just alive but actively purifying the air and boosting your mood. The best part? It grows with you—add more plants as you master the setup, or keep it simple with a few statement pieces. Let’s get your walls growing!
Whether you’re working with a sunroom, bedroom nook, or even a closet, these ideas adapt to any indoor space. The only limit is your creativity—so grab some plants and let’s make it happen!
📚 In This Guide
- What you need
- Instructions
- Tips and common mistakes
- Wrapping up and next steps
What you need
- ● Container or planter: A shallow, wide tray or bed (e.g., a wooden crate, plastic bin, or fabric grow bag). Size: At least 6–12 inches deep and wide enough for your plants (e.g., 12"x24" for 3–5 plants).
- ● Growing medium: High-quality potting mix (look for a blend labeled for container gardens or hydroponics). Quantity: Enough to fill your bed to ~1–2 inches below the rim.
- ● Drainage layer: Small pebbles, hydroponic clay pellets, or a mesh screen to prevent root rot. Quantity: 1–2 inches at the bottom of your bed.
- ● Plants: Choose slow-growing, shallow-rooted varieties like succulents, herbs (basil, thyme), or trailing plants (pothos, string of pearls). Quantity: 3–6 plants, spaced 4–6 inches apart.
- ● Watering can or spray bottle: With a gentle nozzle for even moisture distribution.
- ● Scissors or pruners: For trimming plants or cutting fabric (if using a DIY fabric liner).
- ● Fabric liner: A breathable landscape fabric to line the bed and contain soil (e.g., landscape fabric or burlap).
- ● Decorative elements: Moss, pebbles, or a thin layer of coconut coir for aesthetics.
- ● Self-watering system: A wicking mat or reservoir tray for low-maintenance hydration.
- ● LED grow lights: If your space lacks natural light (e.g., 10–15W LED bulb for 6–8 hours/day).
- ● Plant labels: Chalkboard tags or sticks to track your greens.
Step-by-Step instructions for building an indoor plant bed
Transform your space with this simple, space-saving vertical garden that breathes life into any room.
🪴 Step 1: Gather Materials and Measure Your Space
Start by measuring the wall or shelf where you'll mount your plant bed. I like to use a 24-inch wide wooden board for the base—this gives enough room for four plants (as promised) with 6-inch spacing between them. Gather your pre-cut wooden slats (12-inch long, 3-inch wide)—these will create the vertical pockets for your plants. You'll need four slats for a four-pocket bed.
Check that your wall can support the weight. A lightweight cedar board works well, but if you're unsure, use a wall-mounted bracket for extra support. I always test by pressing down firmly—if it wobbles, add a second bracket or use a heavier base.
🌱 Step 2: Assemble the Plant Bed Frame
Attach the slats vertically to the base board using L-brackets or small nails. Space them 6 inches apart—this gives each plant enough room to grow without competing for nutrients. I like to pre-drill holes to avoid splitting the wood, especially with cedar, which can be a bit finicky.
For extra stability, add a horizontal support beam halfway up the back of the slats. This prevents them from bowing over time. Once assembled, give it a gentle shake to ensure everything stays secure. If it feels wobbly, add more brackets or use a heavier base board.
💧 Step 3: Fill Pockets and Plant Your Greenery
Fill each pocket with moistened potting mix—press it down lightly so it stays in place but doesn’t compact too tightly. I like to use a slow-release fertilizer mixed into the soil to keep my plants thriving with minimal effort. Leave about 1 inch of space at the top of each pocket for watering.
Plant your chosen greenery—succulents, herbs, or small ferns work beautifully. I always start with four plants (as promised) to keep things manageable. Water gently but thoroughly after planting, letting the excess drain out the bottom. This ensures the roots settle into the soil without air pockets.
☀️ Step 4: Position for Light and Water Regularly
Place your plant bed near a south-facing window for the best light exposure. If natural light is limited, supplement with a grow light for 6-8 hours daily. You’ll know it’s getting enough light when the leaves stay vibrant and new growth appears consistently.
Water when the top inch of soil feels dry—this usually means every 5-7 days, but adjust based on your home’s humidity. I like to water from the bottom by placing the bed in a shallow tray of water for 10-15 minutes, letting the soil absorb moisture evenly. This prevents overwatering and keeps roots healthy.
✂️ Step 5: Maintain and Enjoy Your Vertical Oasis
Prune any leggy growth or yellowing leaves to encourage bushier, healthier plants. I always use clean, sharp scissors to avoid damaging the stems. If you notice dust on the leaves, wipe them gently with a damp cloth—this helps them absorb light more efficiently.
Rotate the bed a quarter turn every few weeks so all sides get even light exposure. This prevents plants from leaning toward the window. With proper care, your indoor plant bed will stay lush and vibrant, turning any corner of your home into a thriving green space.
Tips & tricks for perfect indoor plant bed assembly
Building your vertical garden can be a game-changer for small spaces—here's how to avoid common pitfalls and create a sturdy, beautiful setup.
Material Selection Matters: Cedar is lightweight and naturally resistant to rot, but if you're using a different wood, treat it with a non-toxic sealant first. I learned this the hard way when my untreated pine slats started warping after just a few weeks. For extra durability, consider using redwood or fir if cedar isn't available. The 24-inch base board is perfect for four plants, but if you want more pockets, simply add extra slats while maintaining that 6-inch spacing between them.
Pre-Drilling Prevents Splitting: Cedar can be tricky to work with—it's soft enough to split easily when nailing. Always pre-drill holes for your nails or brackets, especially near the edges. I use a drill bit just slightly smaller than my nails to create pilot holes. For the horizontal support beam in Step 2, position it about halfway up the back of the slats. This simple addition prevents bowing and keeps your entire structure stable, especially when fully planted.
Lighting Strategy: The 6-8 hours of grow light mentioned in Step 4 is ideal, but placement matters just as much. Position your grow light about 6-12 inches above the plants for even coverage. If using natural light, rotate your plant bed a quarter turn every few weeks (as mentioned in Step 5) to prevent plants from leaning toward the window. I've found that placing the bed near an east-facing window can also work well—morning light is gentler and helps prevent leaf scorch.
Watering Wisdom: The 10-15 minute bottom-watering method in Step 4 is brilliant for even moisture distribution. For best results, use a shallow tray that's about 1-2 inches deep—this gives roots enough time to absorb water without drowning. If you notice water pooling at the bottom after 15 minutes, reduce the time slightly. And here's a pro tip: add a small layer of pebbles to the bottom of each pocket before adding soil—this improves drainage and prevents root rot, especially for moisture-sensitive plants like succulents.
Pro Tips for Indoor Plant Bed
- Building your vertical garden can be a game-changer for small spaces—here's how to avoid common pitfalls and create a...
- Material Selection Matters: Cedar is lightweight and naturally resistant to rot, but if you're using a different wood...
- Pre-Drilling Prevents Splitting: Cedar can be tricky to work with—it's soft enough to split easily when nailing. Alwa...
Frequently asked questions
Got questions about creating your own indoor plant bed? You’re not alone!
Here are some of the most common concerns—and their easy solutions—to help you build a thriving vertical garden without the stress.
What’s the best soil mix for an indoor plant bed?
Use a lightweight, well-draining mix like cactus or succulent soil blended with perlite or coco coir. Avoid heavy garden soil—it compacts and suffocates roots. For moisture-loving plants (like ferns or pothos), add peat moss or orchid bark to improve aeration. Pro tip: Sterilize soil by baking it at 200°F for 30 minutes to kill pests before planting!
How often should I water my indoor plant bed?
Check moisture every 5–7 days, but frequency depends on your plants and climate. Stick your finger 1–2 inches into the soil—if it’s dry, water thoroughly until it drains from the bottom. Overwatering is the #1 killer! Use a spray bottle for delicate plants (like fittonia) and a watering can with a long spout for deeper beds. Drainage holes are non-negotiable.
Can I reuse containers or materials from an old indoor plant bed?
Clean and disinfect containers with a 10% bleach solution (rinse well) or soak in vinegar to kill algae/mold. Replace old growing medium entirely—it may harbor pests or fungi. Repurpose items like plastic crates, pallets, or even hanging shoe organizers as creative (and budget-friendly) planters!
What do I do if pests show up in my indoor plant bed?
Start with neem oil spray or insecticidal soap for soft-bodied pests (aphids, spider mites). For stubborn critters, isolate the plant and wipe leaves with a soapy water cloth. Prevent future infestations by spacing plants for airflow and inspecting new additions for hitchhikers. Yellow sticky traps can catch flying pests like fungus gnats.
Are indoor plant beds safe for pets or kids?
Choose pet-safe plants like spider plants, Boston ferns, or parlor palms. Avoid toxic varieties (e.g., pothos, philodendron, or sago palm). Keep the bed out of reach or opt for a enclosed system with a mesh cover. Always research your plants—when in doubt, consult the ASPCA’s toxic plant list.
Wrapping up and next steps
Creating an indoor plant bed is a game-changer for small spaces—it brings nature indoors, boosts air quality, and adds a touch of serenity to your home. 🌿 Whether you’re a green thumb or just starting, this vertical garden oasis is a rewarding project that grows with you.
Ready to transform your space?
Your next step? Pick your plants, gather supplies, and start building! Share your progress with us—we’d love to see your indoor jungle come to life. Happy gardening! 🌱