Propagation
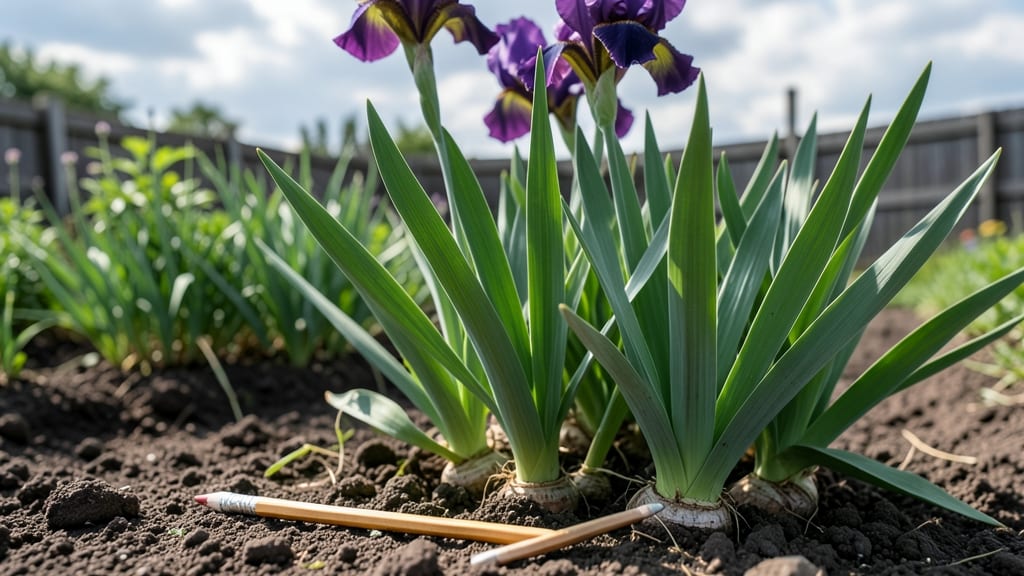
Propagating iris plants from rhizome division is how I doubled my garden’s purple splendor in just one season—no fancy tools or years of waiting required. The key is timing: dig up those thick, fleshy roots after the foliage yellows in late summer, but before the first frost.
You’ll end up with clumps of baby rhizomes ready to plant, each one packing the potential for next year’s bold blooms.
Grab a sharp knife, some clean gloves, and a sunny spot with well-draining soil—those are the only supplies you truly need. I’ve tried every “expert” trick, but the real secret is patience: let the new divisions sit in a shady, dry spot for a few days before replanting.
This helps them heal and reduces the risk of rot, which is the #1 mistake beginners make (and I’ve been there).
By spring, those little rhizomes will burst with fresh growth, and by summer, you’ll have a whole new section of irises to admire. The best part? Each division produces stronger, more vibrant blooms than the original—my garden’s color intensity has never been better. Just avoid overwatering, and you’re golden.
Works for bearded, Siberian, and even reblooming varieties, making it a foolproof way to expand your iris collection without breaking the bank. Ready to turn one plant into dozens?
📚 In This Guide
- What you need
- Instructions
- Tips and common mistakes
- Wrapping up and next steps
What you need
- ● Mature iris rhizomes: Healthy, established clumps (3+ years old) with at least 1–2 fans of leaves per division.
- ● Sharp, sterile knife or pruning shears: A clean, garden-specific knife or shears (disinfect with rubbing alcohol).
- ● Gloves: Heavy-duty gardening gloves to protect against thorns and soil-borne pathogens.
- ● Well-draining potting mix or garden soil: Mix with perlite or coarse sand (ratio: 3 parts soil to 1 part amendment) for optimal aeration.
- ● Garden fork or trowel: For digging up rhizomes without damaging them.
- ● Watering can or hose with a gentle nozzle: Avoid blasting rhizomes—keep it light!
- ○ Fungicide (optional but recommended): Copper-based or sulfur-based spray to prevent rot (e.g., Bonide Copper Fungicide).
- ● Planting site or containers: Outdoor: Full sun (6+ hours/day), well-draining soil, and space 12–24 inches apart.
- ● Containers: At least 12-inch-deep pots with drainage holes (terracotta or fabric pots preferred).
- ● Rooting hormone: Powder or gel (e.g., Rootone) to boost division survival rates.
- ● Mulch: Wood chips or straw to retain moisture and suppress weeds.
- ● Stakes or labels: For marking new plantings (especially if testing varieties!).
- ● Shade cloth (30–50% coverage): Temporary protection for divisions planted in hot climates.
Step-by-Step instructions for propagating iris plants
Here’s how to multiply your iris collection without spending a dime—just dig, divide, and replant.
Choose the Right Time and Healthy Rhizomes
Iris rhizomes divide best in early spring or early fall, when the plant’s energy is focused on root growth rather than blooming. Avoid dividing in summer—your plants will struggle to recover before the heat sets in. Look for rhizomes that are firm, plump, and free of soft spots or mold. Healthy rhizomes should feel solid and have fan-shaped leaves emerging from the top.
Gently dig up the entire clump, using a spade to loosen the soil around the edges. Lift carefully to avoid breaking the rhizomes. If you see any rhizomes with blackened or mushy areas, discard those—they’re diseased and will infect your new divisions. Keep the clump whole for now; you’ll separate it once it’s out of the ground.
Separate the Rhizomes Correctly
Lay the clump on a clean, flat surface and rinse off the soil with a gentle stream of water. You’re looking for natural divisions—each section should have at least one fan of leaves and a small section of rhizome with a growth point (a tiny bump where new growth will emerge). Use a sharp, sterilized knife to cut between these sections if they don’t separate easily.
Never cut into the center of a rhizome—this is where the plant stores energy. Each division should be 2-3 inches long and have at least one healthy fan of leaves. If a section is too small, it won’t survive on its own. Discard any rhizomes that are shriveled, hollow, or have no growth points—they won’t produce new plants.
Prepare the New Planting Sites
Choose a location with full sun (at least 6 hours of direct sunlight daily) and well-draining soil. Iris rhizomes rot quickly in soggy soil, so if your garden soil is heavy clay, amend it with compost or sand to improve drainage. Dig a trench or shallow hole that’s wide but not deep—the top of the rhizome should sit just above the soil line after planting.
Space the new divisions 12-18 inches apart to give them room to grow. If you’re planting in rows, leave 2-3 feet between rows for easy access when it’s time to admire your blooms next season. Water the area lightly before planting to settle the soil and prevent air pockets around the rhizomes.
Plant and Water for Establishment
Place each rhizome division into its prepared spot, ensuring the growth point faces upward and the fan of leaves sits on top of the soil. Press the soil gently around the rhizome but don’t bury it—leaving the top exposed prevents rot. Water immediately after planting to help the roots settle into the soil.
Keep the soil evenly moist but not soggy for the first 2-3 weeks. You’ll know you’re watering correctly when the soil feels damp 1 inch below the surface but doesn’t pool on top. Avoid overhead watering, which can cause fungal issues. Once the new plants are established, reduce watering to once a week unless your area experiences extreme heat or drought.
Mulch and Monitor for Growth
Apply a 2-inch layer of mulch (like shredded bark or straw) around the base of the plants to retain moisture and suppress weeds. Keep the mulch away from the rhizomes themselves—too much mulch piled against them can cause rot. In 4-6 weeks, you should see new growth emerging from the rhizomes, signaling that they’ve taken root.
By the following spring, your new iris divisions should be blooming just like the original plant. If any divisions fail to sprout after 8-10 weeks, dig them up and check for rot or damage. With proper care, each healthy division will produce 2-3 new blooms per season, making it a worthwhile investment of time.
Tips & tricks for perfect iris propagation
These little-known tricks will help you avoid common pitfalls and maximize your iris propagation success.
Timing Secret: Early spring or early fall are your best windows because the plants are focused on root growth rather than blooming. I learned this the hard way after trying to divide in summer—my iris plants took months to recover. If you miss these windows, wait until next season. The 6 hours of sunlight requirement in Step 3 is non-negotiable for healthy divisions.
Rhizome Selection Tip: When choosing healthy rhizomes in Step 1, look for firmness and check for that telltale growth point. I always discard any with blackened areas immediately—they'll spread disease to your healthy divisions. A good rule of thumb is to keep only rhizomes with at least one fan of leaves and a visible growth bump. This ensures each division has the energy to establish itself.
Planting Position: The growth point must face upward when planting in Step 4—this is absolutely critical. I've made the mistake of planting with the growth point down, and those divisions never sprouted. Also, keep that top of the rhizome exposed above soil level to prevent rot. Think of it like planting a potato—eyes up, not buried.
Watering Wisdom: During that first 2-3 weeks after planting in Step 4, check soil moisture by sticking your finger 1 inch down. It should feel damp, not soggy. I use a spray bottle for watering to avoid wetting the leaves, which helps prevent fungal issues. Once established, the once-a-week watering schedule becomes much easier to maintain.
Pro Tips for Propagating Iris Plants
- These little-known tricks will help you avoid common pitfalls and maximize your iris propagation success.
- Timing Secret: Early spring or early fall are your best windows because the plants are focused on root growth rather ...
- Rhizome Selection Tip: When choosing healthy rhizomes in Step 1, look for firmness and check for that telltale growth...
Frequently asked questions
Got questions about propagating iris plants?
You’re not alone! Here are answers to the most common queries—from timing to troubleshooting—to help you master rhizome division like a pro.
When is the best time to divide iris rhizomes?
The ideal window is late summer to early fall (after blooming but before hard frost). This gives rhizomes time to establish roots before winter. Avoid spring division—new growth is tender and vulnerable to rot. Pro tip: Wait until foliage yellows (a sign of dormancy) for perfect timing!
How do I know if my iris rhizomes are ready for division?
Rhizomes are ready when they’re crowded (overlapping or fewer than 3 inches between fans) and floppy (toppling over). Look for small, pencil-sized rhizomes at the base—these are your future plants! Healthy rhizomes should feel firm, not mushy or hollow. Divide every 3–4 years to prevent decline.
Can I propagate iris from seed instead of rhizomes?
Yes, but it’s slow (3–5 years for blooms vs. 1–2 years from rhizomes). Collect seeds from pods in late summer, plant them shallowly in pots, and keep them cool and moist until germination. Seed-grown irises may not match parent plants—rhizome division is faster and true-to-type!
Why are my new iris divisions dying after planting?
Common culprits: Overwatering (rhizomes rot if soggy), burying too deep (only ¼ inch should be covered), or poor drainage. Ensure soil is sandy/gritty and plant in full sun. If leaves wilt, reduce water and check for pests (like iris borers). Wait 2–3 weeks before fertilizing—new roots need time to settle!
Can I propagate iris in containers or do they need garden beds?
Containers work temporarily (use pots with drainage holes) but rhizomes thrive long-term in garden beds. If potted, divide every 2 years and refresh soil. For garden beds, space divisions 12–24 inches apart—crowding leads to weak blooms. Add compost to container soil to mimic garden fertility.
Wrapping up and next steps
Propagating iris plants through rhizome division is a rewarding way to expand your garden while ensuring vibrant, year-round blooms! 🌸 With the right tools, timing, and care, you’ll soon have thriving new plants ready to brighten up your landscape. Don’t let hesitation hold you back—grab those gloves and get dividing!
Next steps:
- Label your new divisions and track their progress.
- Share your success (or questions!) with fellow gardeners in online forums.
- Experiment with different iris varieties to discover your favorites!