Vegetables
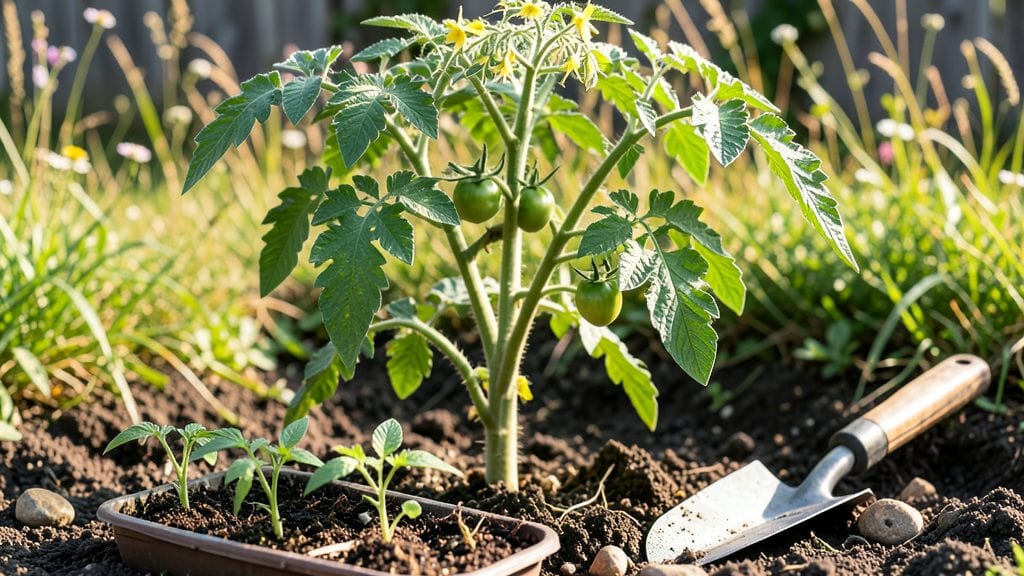
Planting tomatoes outdoors means turning those puny window seedlings into vibrant, sun-ripened plants that feed you all summer. 🌱 I’ve watched my first tomato plants go from fragile transplants to towering producers—it’s not magic, just the right timing, soil, and a little elbow grease.
The difference between a thriving vine and a sad, leggy shadow often comes down to the first 30 days after transplanting.
Start with determinate varieties (bush types) if you want compact plants for sauces or indeterminate (vining) types for slicing tomatoes that keep producing until frost. Your soil needs to be warm (at least 60°F) and amended with compost—cold, heavy soil will stunt roots.
Pick a spot with full sun (6-8 hours daily) and room to spread: indeterminate varieties need 3-4 feet between plants, while determinate types can squeeze in at 2 feet.
When transplanting, bury the stem deeper than it was in the pot—up to the first leaves—to encourage strong roots. Water deeply right after planting, then mulch to keep moisture in and weeds out.
Within 2-3 weeks, you’ll see new growth shooting up, and by midsummer, you’ll be harvesting tomatoes that taste nothing like store-bought. The key is consistency: water at the base (not the leaves) and stake or cage plants early to avoid flopping.
This method works for containers too—just use a 5-gallon pot for determinate types or 10+ gallons for vining varieties. Whether you’re in a backyard or balcony, the same rules apply: sun, warmth, and patience. Let’s get those tomatoes growing!
📚 In This Guide
- What you need
- Instructions
- Tips and common mistakes
- Wrapping up and next steps
What you need
- ● Tomato plants: 3–6 healthy seedlings or transplants (choose disease-resistant varieties like 'Celebrity,' 'Roma,' or 'Cherry').
- ● Well-draining potting mix: 5–10 gallons (or a blend of 60% topsoil, 30% compost, and 10% perlite/sand).
- ● Containers or garden bed: Containers: 5-gallon pots or larger (1 plant per 1–2 gallons of soil).
- ● Garden bed: Full sun (6+ hours/day), raised bed or in-ground plot (minimum 18" deep).
- ● Fertilizer: Balanced organic fertilizer (10-10-10) or compost (1 cup per plant at planting).
- ● Stakes or cages: 6–8 ft tall bamboo stakes or tomato cages (1 per plant).
- ● Mulch: Straw or shredded leaves (2–3 inches thick to retain moisture).
- ● Watering can or hose: With a gentle spray nozzle.
- ● Pruning shears: Sharp, clean pair for trimming suckers.
- ● Slow-release fertilizer tablets for containers.
- ● Drip irrigation system for consistent watering.
- ● Row covers or shade cloth (for early-season protection).
- ● Plant markers to track varieties.
- ● Epsom salt (1 tbsp per plant monthly for magnesium boost).
Step-by-Step instructions for planting tomatoes outdoors
Here's how to transition your seedlings from cozy indoor starts to a thriving outdoor garden.
🪴 Step 1: Prepare the Planting Site
Choose a location with full sun exposure (6-8 hours daily) and well-draining soil. Tomatoes despise soggy roots, so avoid low spots where water pools. I like to test drainage by digging a 12-inch deep hole—if it fills with water within an hour, amend the soil with compost or build a raised bed.
Work in 2-3 inches of compost or aged manure mixed into the top 6 inches of soil. This boosts fertility without overwhelming young plants. Avoid fresh manure—it burns tender roots. A handful of balanced fertilizer (10-10-10) per planting hole gives seedlings a nutrient kick without overdoing it.
🌱 Step 2: Harden Off Seedlings
Start 10-14 days before transplanting by moving seedlings outdoors for 1-2 hours daily in a sheltered spot. Gradually increase exposure over 7-10 days
Skip this step and you risk transplant shock: leaves scorch, stems snap, and plants wilt dramatically. On the last day, leave them out overnight to acclimate fully. If frost threatens, cover with a lightweight row fabric for protection. Wait until soil temperatures reach 60°F and nighttime temperatures stay above 50°F. Dig holes just deep enough to bury the stem up to the first set of true leaves—this encourages strong root growth. Space plants 18-24 inches apart for determinate varieties or 24-36 inches apart for indeterminate types. Remove seedlings from their pots carefully, loosening roots if they're root-bound. Place each plant in its hole, then water deeply to settle soil around the roots. A mulch ring of 2-3 inches of straw or grass clippings retains moisture and suppresses weeds. Avoid piling mulch against stems—this traps moisture and invites disease. Water deeply every 2-3 days until top 2 inches of soil feel dry. Tomatoes need consistent moisture, but soggy soil causes blossom end rot. I water at the base in the morning to reduce evaporation and fungal risks. Avoid wetting leaves—this spreads disease. Install cages or stakes immediately. Indeterminate varieties grow 6-10 feet tall and need sturdy support. Tie stems loosely with soft plant ties, leaving room to grow. Prune suckers (shoots in leaf axils) when they're 6 inches long to direct energy to fruit production. This step prevents sprawling vines and improves airflow. Fertilize when flowers appear with a balanced 10-10-10 or tomato-specific formula. Side-dress with compost every 4-6 weeks to replenish nutrients. Watch for pests like hornworms—handpick them early to prevent defoliation. You'll see new leaves emerge after pruning and fertilizing—that's your cue everything's working. Harvest when tomatoes are fully colored and slightly soft to the touch. Pick regularly to encourage more production. If frost threatens, harvest green tomatoes and ripen indoors. A cardboard box with a banana speeds up ripening naturally—ethylene gas triggers the process.☀️ Step 3: Transplant at the Right Time
💧 Step 4: Water and Support New Plants
✂️ Step 5: Maintain Through the Season
Tips & tricks for planting tomatoes outdoors
Real talk: The difference between thriving tomato plants and sad, struggling ones often comes down to these small but critical details during transplanting.
Soil Temperature Matters: Those 60°F soil temperatures in Step 3 are non-negotiable for healthy root establishment. I use a soil thermometer to confirm—cold soil slows growth and stresses plants. If your soil runs cooler than 50°F at night, consider using black plastic mulch to warm the ground faster. This is especially important for indeterminate varieties that need to establish deep roots quickly for their towering growth.
Harden Off Strategically: During the 10-14 day hardening process in Step 2, I increase exposure gradually—not just time, but also intensity. Start with morning sun only, then add afternoon sun over the final 3-4 days. This mimics natural progression and prevents the shock you get when suddenly exposing tender leaves to full sun. Watch for leaves that look slightly wilted but perk up when watered—that's normal! If they stay wilted, they're not ready yet.
Root Care is Everything: When transplanting in Step 3, gently tease apart root-bound seedlings to encourage outward root growth. I make small vertical cuts with a clean knife along the root ball if roots are circling tightly. This helps them establish faster in their new home. Remember, you're burying stems up to the first true leaves—not just the base—to trigger stronger root development along the buried portion.
Watering Wisdom: The every 2-3 days guideline in Step 4 assumes consistent weather. In hot, dry climates, you might need daily watering until plants establish. I check moisture by sticking my finger 2 inches deep—that's when it's time to water. Morning watering is key because it gives leaves time to dry before evening, reducing fungal risks. A drip irrigation system set at the base is my go-to for consistent moisture without wetting foliage.
Pro Tips for Planting Tomatoes Outdoors
- Real talk: The difference between thriving tomato plants and sad, struggling ones often comes down to these small but critical details during transplanting.
- Soil Temperature Matters: Those 60°F soil temperatures in Step 3 are non-negotiable for healthy root establishment.
- Harden Off Strategically: During the 10-14 day hardening process in Step 2, I increase exposure gradually—not just time, but also intensity.
Frequently asked questions
Got questions about growing tomatoes outdoors? You’re not alone! Here are answers to the most common queries to help you grow a thriving tomato harvest.
When is the best time to plant tomatoes outdoors?
The ideal time depends on your climate. In most regions, plant after the last frost when soil temperatures reach at least 60°F (15°C). Use a soil thermometer to check—cool soil can stunt growth. For cooler areas, start seeds indoors 6-8 weeks before the last frost date.
How long does it take for outdoor tomatoes to grow?
From transplanting to harvest, expect 60-85 days for most varieties, but this varies. Cherry tomatoes may ripen in 50-60 days, while heirlooms can take 80+ days. Warmth, sunlight, and consistent watering speed things up!
Can I plant tomatoes directly in the ground without starting indoors?
Many gardeners plant transplants (young plants from nurseries) directly outdoors after hardening off. For seeds, sow them 1/4 inch deep in warm soil (70°F/21°C+) and thin seedlings to 18-24 inches apart. Just be patient—seedlings take 2-3 weeks to sprout.
Why are my outdoor tomato plants wilting even with enough water?
Wilting can signal overwatering, underwatering, or heat stress. Check soil moisture—it should be 1 inch dry at the surface but damp deeper down. Mulch helps retain moisture. If leaves curl in heat, provide afternoon shade or water deeply in the early morning.
What’s the best fertilizer for outdoor tomatoes?
Use a balanced fertilizer (10-10-10) at planting, then switch to a high-phosphorus (5-10-10) or tomato-specific feed when flowers appear. Avoid high-nitrogen fertilizers—they boost leaves over fruit. Compost or worm castings also work wonders!
Wrapping up and next steps
Planting tomatoes outdoors is a rewarding journey from seedling to sun-ripened fruit—packed with fresh flavors and bragging rights! 🌱 With the right location, soil, and care, you’ll turn your sunny patch into a thriving tomato haven.
Whether you’re a first-timer or a seasoned gardener, every seed you plant is a step toward a harvest that tastes better than anything store-bought.
Ready to dive in? Start by picking your favorite variety—cherry, beefsteak, or heirloom—and grab those supplies! Then, roll up your sleeves and get growing. Your future salads, sandwiches, and sauces will thank you. 🍅✨