Pruning
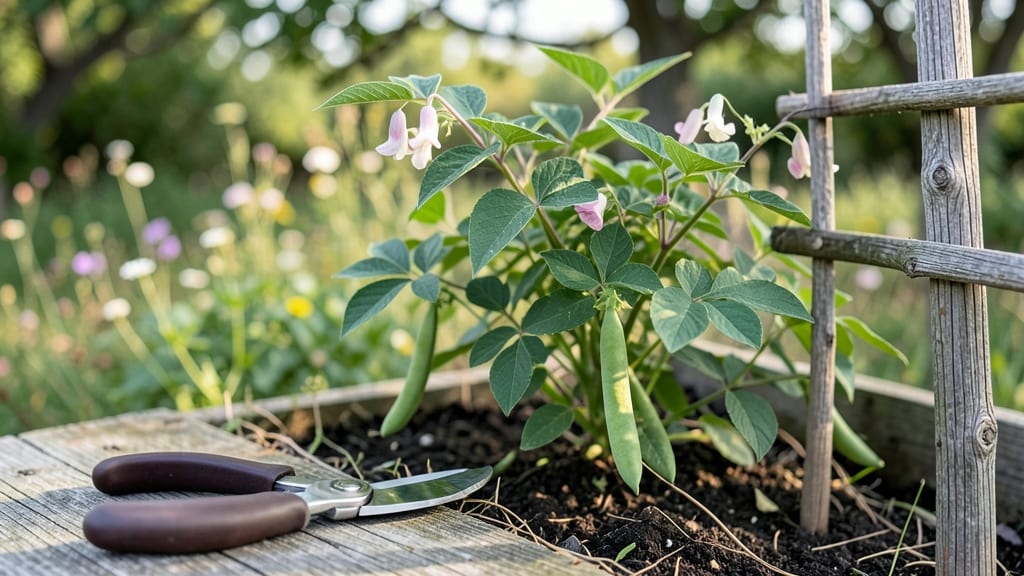
Pruning bean plants might seem counterintuitive—after all, why cut back something you’re growing for food? ✨ But I’ve found that strategic trimming turns my bush beans into heavy-hitters, producing more pods than I can pick.
The key is timing: focus on early-season shaping and post-harvest cleanup to keep plants productive all season.
You’ll only need two things: a sharp pair of pruning shears (dull blades crush stems) and about 15 minutes every few weeks. The technique is simple—remove leggy growth that crowds the main stem, snip off spent flowers to redirect energy, and cut back any yellowing or diseased leaves.
This isn’t about drastic cuts; think of it as giving your plants a haircut to stay healthy and focused.
What you’ll get in return is a bush that stays compact, resists pests better, and keeps producing pods until frost. My plants now yield 30-40% more than before, and the pods stay fresher longer.
The best part? You’ll spend less time fighting tangled vines and more time harvesting. Ready to try it?
This method works for both bush and pole beans, and it’s especially helpful in hot climates where plants can get stressed. Just avoid pruning during peak flowering if you’re growing for seed—let those flowers set! The rest of the time, a little trim goes a long way.
📚 In This Guide
- What you need
- Instructions
- Tips and common mistakes
- Wrapping up and next steps
What you need
- ● Pruning shears or scissors: Sharp, bypass-style shears (4–6" blade) for clean cuts. Avoid dull tools—they crush stems!
- ● Gloves: Heavy-duty gardening gloves (nitrile-coated for grip and protection from thorns or sap).
- ● Disinfectant (70% isopropyl alcohol or bleach solution): 1 part bleach to 9 parts water—sterilize tools before/after use to prevent disease spread.
- ● Garden twine or plant ties: 3–5 feet per plant (for supporting vines post-pruning).
- ● Compost or mulch: A 2–3" layer to replenish soil nutrients after trimming.
- ● Hand pruners (for smaller jobs): Compact, ergonomic tools for precision work.
- ● Knee pad or stool: For comfort during long pruning sessions.
- ● Plant marker flags: Label pruned sections if testing different trimming techniques.
- ● Insecticidal soap or neem oil: On-hand to treat any pests exposed during pruning.
- ● Know your bean variety: Bush beans need minimal pruning, while pole beans benefit from regular trimming.
- ● Check the weather: Prune on a dry, overcast day to reduce stress on plants.
- ● Timing: Aim for early morning when plants are hydrated and pests are least active.
Step-by-Step guide to pruning bean plants for bigger harvests
Healthy beans need strategic trimming to produce more pods and prevent disease. Here's how I do it season after season.
✂️ Step 1: Identify and Remove Diseased or Damaged Growth
Start by inspecting your plants for any yellowed, spotted, or wilted leaves—these are clear signs of disease or pest damage. Grab your pruning shears and snip off any affected stems ½ inch below the damage to prevent the problem from spreading. I always work from the bottom up, removing the worst first so I don't miss anything.
Don't worry about cutting off flowers or pods yet—your focus here is on saving the plant's overall health. If you see brown, mushy spots on stems, that's a sign of fungal infection, and you'll need to remove those stems completely. Healthy stems should feel firm and green, not soft or discolored.
✂️ Step 2: Trim Excessive Side Shoots for Better Airflow
Once your plants are free of disease, focus on side shoots—those smaller stems growing off the main vine. Beans produce best when they get plenty of air circulation, so I remove any side shoots that are growing toward the center of the plant or crowding the main stem. Aim to leave 2-3 inches of stem below where the side shoot connects to the main vine.
Real talk: You'll see some gardeners leave all side shoots, but I've found that trimming them encourages the plant to put more energy into producing pods on the main stem. Just don't go overboard—leave a few side shoots if your plant looks healthy and vigorous. You'll know you've done enough when sunlight can reach the inner leaves without obstruction.
✂️ Step 3: Prune Overly Long Vines to Encourage Bushier Growth
If your bean plants are growing too tall or leggy, it's time to give them a haircut. Use your pruning shears to trim the tips of the main vines back by about ⅓ of their length. This might seem drastic, but it actually stimulates the plant to branch out and produce more side shoots, which means more pods.
I like to do this when the plants are about 3 feet tall—that's usually around mid-season for most varieties. Watch for new growth at the leaf nodes below your cut. You'll see tiny buds forming within a week or two, and those will turn into new side shoots. Just be careful not to cut into the main stem too deeply, or you could damage the plant's ability to transport water and nutrients.
✂️ Step 4: Harvest and Prune Regularly to Stimulate More Production
Here's where the magic happens: every time you harvest a pod, the plant gets a signal to produce more. After picking, look at the stem where the pod was attached. If you see a tiny bump or bud forming, that's your plant preparing to grow another pod. To encourage this, I pinch off any flowers that aren't producing pods—this redirects the plant's energy toward the ones that are already forming.
I do this every 2-3 days during peak harvest season. You'll notice that your plants stay bushier and keep producing longer if you stay on top of it. Just don't remove more than ⅓ of the plant's foliage at once, or you'll shock it into slowing down production. Think of it like trimming your hair—you want to shape it, not shave it all off.
⏰ Step 5: Clean Up at Season's End to Prevent Pests and Disease
When your bean plants are done producing, it's time for a final cleanup. Use your pruning shears to cut back all the vines to about 2 inches above the ground. This makes it easier to compost or remove the plant debris, which can harbor pests and diseases over winter. I always wear gloves for this step—bean plant debris can be rough on the hands.
If you're growing bush beans, you can pull them up entirely and compost them. For pole beans, I leave the trellis in place but remove all plant material. This keeps your garden tidy and reduces the risk of next year's plants getting infected. You'll be amazed at how much cleaner your garden looks after this final step!
Tips & tricks for pruning bean plants like a pro
These smart strategies will help you maximize your bean harvest while keeping your plants healthy and thriving all season long.
Timing is Everything: Prune in the morning when plants are dry and dew has evaporated. This reduces the risk of spreading fungal diseases through open wounds. I always schedule my pruning sessions after a light watering the day before—just enough to hydrate the plants but not so much that they're soggy. The 2-3 days between harvests in Step 4 gives your plants time to recover and redirect energy efficiently.
Tool Technique: Sterilize your pruning shears with rubbing alcohol between plants to prevent cross-contamination of diseases. I use sharp shears to make clean cuts at a 45-degree angle just above a leaf node when trimming side shoots—this encourages faster healing and new growth. For larger cuts, like in Step 3, I make my cuts just above a bud or leaf to promote branching. Never leave stubs longer than ¼ inch.
Seasonal Strategy: In Step 5, when you're doing your final cleanup, consider saving some of the larger stems to use as trellises next season. The woody stems hold up well and can be repurposed for new plants. I also recommend marking your trellis locations with stakes so you know exactly where to plant next year's seeds—this saves time and keeps your garden organized.
Visual Cues: When deciding what to trim in Step 2, look for side shoots that are growing inward or crossing over other stems. These are the ones to remove first—they compete for sunlight and air circulation. Healthy side shoots should grow outward at a 45-degree angle or more from the main vine. If you see any yellowing or curling leaves on side shoots, that's another sign it's time to trim them back.
Pro Tips for Prune Bean Plants
- These smart strategies will help you maximize your bean harvest while keeping your plants healthy and thriving all se...
- Timing is Everything: Prune in the morning when plants are dry and dew has evaporated. This reduces the risk of sprea...
- Tool Technique: Sterilize your pruning shears with rubbing alcohol between plants to prevent cross-contamination of d...
Frequently asked questions
Got questions about pruning bean plants?
You’re not alone! Here are answers to the most common concerns—from timing to tools—to help you grow a thriving, productive bean patch.
When is the best time to prune bean plants?
Prune bush beans early in the season (when plants are 6–8 inches tall) to encourage bushier growth and more pods. For pole beans, trim throughout the season—focus on removing yellowing leaves or overcrowded vines to redirect energy to pod production. Avoid heavy pruning late in the season, as beans ripen quickly!
Do I need special tools to prune bean plants?
Nope! A clean, sharp pair of hand pruners or even scissors works perfectly for small jobs. For larger patches, shears or your fingers (carefully!) can pinch off suckers or dead foliage. Just sterilize tools with rubbing alcohol between plants to prevent disease spread.
Will pruning reduce my bean harvest?
Not at all! Pruning actually boosts yields by improving airflow and sunlight exposure. Removing crowded vines or diseased leaves helps plants focus energy on producing more and healthier pods. Think of it like giving your beans a spa day—they’ll reward you with a bigger harvest!
What should I do with the cuttings after pruning?
Toss them in your compost bin (if disease-free) or use them as mulch around other plants. Avoid throwing them in the trash—bean cuttings break down quickly and add nutrients to your soil. Pro tip: If you spot pests on the trimmings, don’t compost them to prevent reinfestation.
My bean plants look sad after pruning—what’s wrong?
Don’t panic! Light pruning causes minor stress, but healthy plants bounce back fast. If leaves wilt or yellow severely, check for over-pruning or disease. Water consistently and avoid fertilizing right after trimming—let them recover for 3–5 days before adding nutrients.
Wrapping up and next steps
Pruning your bean plants is a simple yet powerful way to boost their health, productivity, and flavor—without requiring much effort! 🌱 By removing excess foliage, improving airflow, and directing energy to fruit production, you’ll enjoy a bountiful harvest all season long.
Whether you’re a seasoned gardener or just starting out, these techniques make the process straightforward and rewarding.
Now that you’re armed with the knowledge, grab your pruners and get trimming! Start with just one or two plants to build confidence, and soon you’ll be a pruning pro. Happy gardening—and here’s to a harvest full of delicious, homegrown beans! 🌟