Pruning
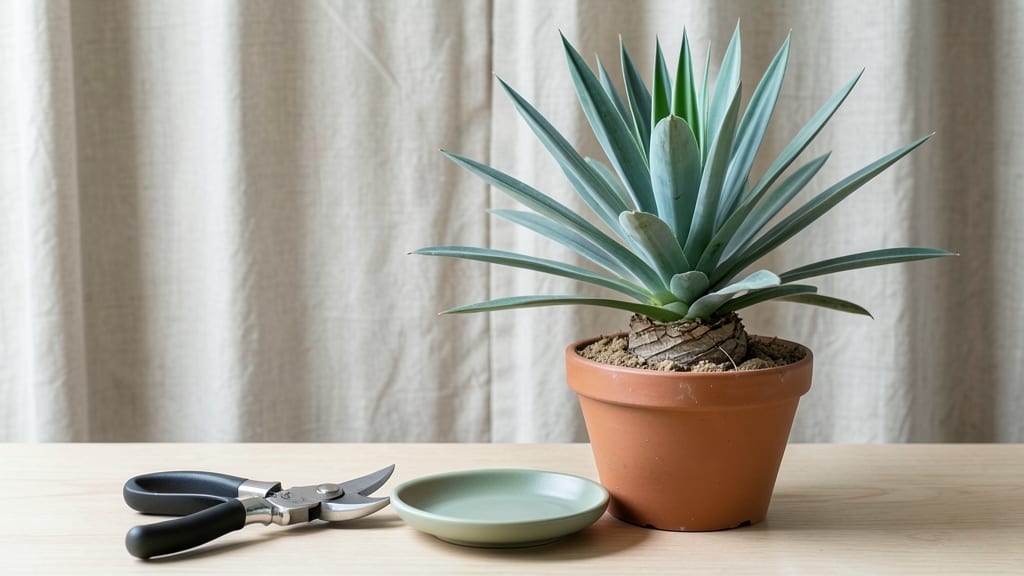
Yucca plant trimming transforms a scraggly mess into a neat, vibrant centerpiece—if you do it right. ✨ I’ve turned my once-lanky yucca into a thriving showstopper by mastering the timing, cuts, and aftercare, and I’ll show you exactly how.
The key starts with knowing when to prune: late winter or right after flowering, when the plant’s energy shifts from blooms to new growth.
You’ll need sharp pruners, rubbing alcohol for sterilizing, and a clear day to work. Cut back dead leaves at the base, snip old flower stalks just above a leaf node, and trim leggy branches to encourage bushier regrowth.
The goal isn’t to strip the plant—think of it as giving it a haircut, not a buzz cut. Over-pruning stresses yuccas, so aim to remove no more than one-third of the plant at once.
After trimming, your yucca will reward you with fresh, glossy green growth within weeks. The sterilized cuts heal cleanly, and the plant redirects energy into stronger stems and new foliage. Just keep an eye out for sap—it’s harmless but can irritate skin, so wear gloves if you’re sensitive.
With the right cuts, your yucca will stay healthy and full for years, blooming reliably every spring.
This method works for both indoor and outdoor yuccas, whether you’re dealing with a towering specimen or a compact container plant. The same principles apply—just adjust for size. Ready to give your yucca the care it deserves? Let’s get those shears sharp and start trimming.
📚 In This Guide
- What you need
- Instructions
- Tips and common mistakes
- Wrapping up and next steps
What you need
- ● Pruning shears – Sharp, clean bypass pruners (for clean cuts on stems up to ½ inch thick). Avoid dull tools—they crush stems!
- ● Garden gloves – Heavy-duty, cut-resistant gloves (yucca leaves pack a punch!)
- ● Disinfectant – Rubbing alcohol (70%+) or bleach solution (1 part bleach to 9 parts water) (to sterilize tools between cuts).
- ● Pruning saw – Only if trimming thick, woody stems (10-inch curved saw recommended).
- ● Newspaper or drop cloth – To protect surfaces (yucca debris = messy!).
- ● Rooting hormone – For propagating cuttings (gel or powder form).
- ● Small pots with drainage – 3–4 inch pots (if you plan to propagate new plants).
- ● Hose or spray bottle – For rinsing tools or wetting soil (reduces dust when cutting).
- ● Plant tie or twine – To secure large, top-heavy leaves (prevents snapping).
- ● Trash bag – For disposing of large debris (yucca leaves are heavy!).
Step-by-step guide to yucca plant trimming
Here’s how to trim your yucca like a pro—keeping it lush and healthy without stressing the plant.
✂️ Step 1: Identify What to Trim
Yuccas need trimming to remove dead leaves, damaged growth, and overcrowded stems. Start by inspecting the plant from top to bottom. Look for brown, crispy leaves or stems that look dried out—these are prime candidates for removal. Healthy leaves should be firm and green, while damaged ones will feel brittle or hollow when tapped.
Also, watch for pups (baby plants) growing at the base. These can be trimmed off to redirect energy to the main plant, or saved for propagation. I like to keep one pup per mature yucca to maintain balance. Use clean, sharp pruners to avoid tearing the plant.
✂️ Step 2: Make Clean Cuts for Faster Healing
Always trim just above a leaf node or growth point—this is where new shoots will emerge. For dead leaves, cut back to the base of the plant or to a healthy green section. For overgrown stems, trim at a 45-degree angle about ½ inch above a node to prevent water from pooling and causing rot.
I use sterilized pruners dipped in rubbing alcohol to avoid introducing bacteria. Yuccas heal quickly, but a clean cut reduces the risk of infection. Avoid cutting into healthy green tissue—this can stress the plant and slow recovery.
🌱 Step 3: Encourage New Growth After Trimming
After trimming, give your yucca a light fertilizer application to support regrowth. I use a balanced, water-soluble fertilizer diluted to half strength. Water the plant deeply but let the soil dry out between waterings—yuccas hate soggy roots. Place the plant in bright, indirect light for a few weeks to help it recover.
You’ll notice new growth within 4-6 weeks, often from the base or trimmed nodes. If you removed pups, you can replant them in well-draining soil and keep them in bright light to establish roots. This is the plant’s way of saying, “Thanks for the trim!”
⏰ Step 4: Monitor and Maintain Year-Round
Yuccas thrive with minimal upkeep, but a quick check every 3-4 months keeps them looking sharp. Remove any new dead growth immediately—don’t let it linger, as it can attract pests. If your yucca develops long, leggy stems, trim them back to encourage bushier growth.
This is the moment that matters: consistency. A little trimming now means fewer surprises later. With the right cuts and care, your yucca will reward you with healthy, vibrant growth for years.
Tips & tricks for perfect yucca plant trimming
A few simple tricks will help you keep your yucca thriving after every trim—without the guesswork.
Tool Prep Matters: Sterilizing your pruners isn't just about clean cuts—it's about preventing infection. I dip my pruners in rubbing alcohol between cuts, especially when working with multiple plants. This small step makes all the difference in how quickly your yucca recovers. For extra peace of mind, wipe down the blades with a clean cloth after each use.
Timing is Everything: The 4-6 week window for new growth is your best indicator of success. If you don't see any new shoots emerging after that time, it might be worth checking your light conditions or fertilizer application. Yuccas need bright, indirect light to recover properly, so if your plant isn't in the right spot, that could be holding back regrowth.
The 45-Degree Angle Secret: That precise angle when trimming stems isn't just decorative—it prevents water from pooling at the cut site, which could lead to rot. Imagine the cut like a tiny roof that sheds water away from the plant. This small detail can mean the difference between a healthy recovery and potential problems down the road.
Pup Strategy: Keeping one pup per mature yucca maintains balance without overcrowding. If you're propagating pups, let them establish roots in well-draining soil before transplanting. I've found that pups need about 2-3 weeks in bright light to develop a strong root system before they're ready for their permanent home.
Pro Tips for Yucca Plant Trimming
- A few simple tricks will help you keep your yucca thriving after every trim—without the guesswork.
- Tool Prep Matters: Sterilizing your pruners isn't just about clean cuts—it's about preventing infection. I dip my pru...
- Timing is Everything: The 4-6 week window for new growth is your best indicator of success. If you don't see any new ...
Frequently asked questions
Got questions about keeping your yucca plant looking sharp? Here are some of the most common ones—and their answers—to help you trim like a pro!
When is the best time to trim my yucca plant?
The ideal time to trim your yucca is late winter or early spring (just before new growth begins). This gives the plant energy to recover before the growing season. Avoid trimming in extreme heat or cold—your yucca will thank you!
How do I know which branches to cut?
Look for dead, damaged, or overly leggy branches—these are your top priorities. Also trim any flower stalks after they bloom (unless you want seeds!). Healthy branches should have firm, green leaves; anything brown, mushy, or hollow is fair game for the pruners.
What should I do if my yucca starts bleeding sap after trimming?
Don’t panic! Yuccas often ooze a milky sap when cut—it’s totally normal. Let it dry into a callous (a few days), then seal the wound with pruning paint or beeswax to prevent rot. Avoid watering the area until it’s fully healed.
Can I propagate my yucca from trimmings?
After trimming, let the cuttings dry for 1–2 days, then plant them in well-draining soil. Place them in bright, indirect light and keep the soil slightly moist (but not soggy). Roots should form in 4–8 weeks—perfect for expanding your yucca collection!
Do I need to trim my yucca in winter?
Only if you spot frozen or damaged foliage—light trims are fine. Avoid heavy pruning in winter, as the plant is dormant and healing takes longer. If you must trim, wait until late winter when temps start to rise.
Pro Tip:
Always sterilize your pruners with rubbing alcohol before and after trimming to prevent disease. And wear gloves—yucca sap can irritate skin!
Wrapping up and next steps
Trimming your yucca plant isn’t just about aesthetics—it’s a game-changer for its health and vibrancy! 🌿 With the right tools, timing, and technique, you’ll encourage lush growth, prevent pests, and keep your plant thriving year-round. Remember, precision matters, but don’t be afraid to get hands-on and enjoy the process.
Ready to give your yucca the TLC it deserves? Grab your pruners, follow the steps, and watch your plant reward you with stunning, resilient foliage! For extra confidence, revisit the FAQs or check out our pruning calendar to stay on track. Happy trimming!