Pruning
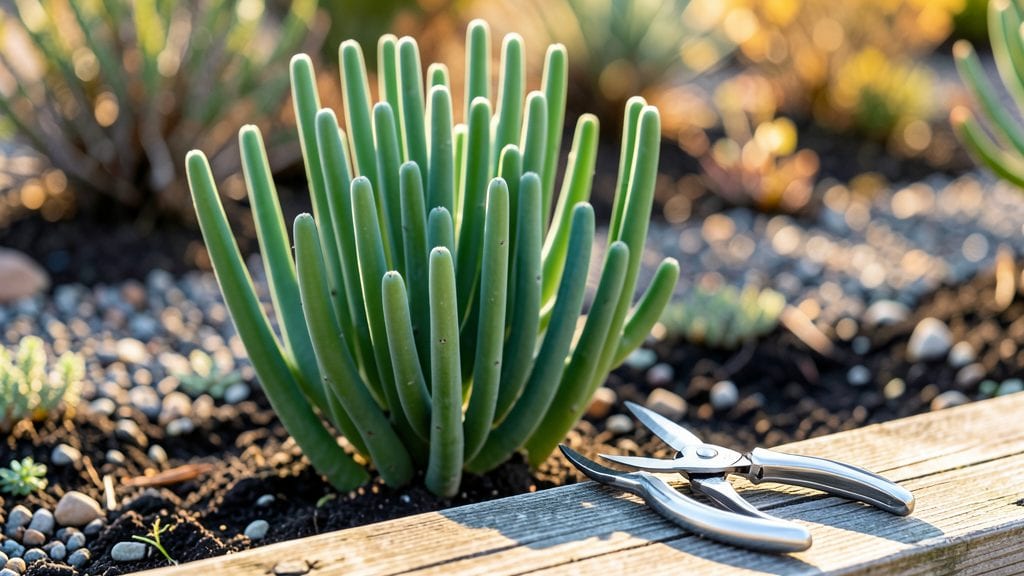
Pruning euphorbia plants keeps them lush and controlled all year long—without the stress of over-trimming. 🌿 I’ve learned the hard way that these plants don’t respond like typical shrubs, and cutting at the wrong time can stunt their growth or even kill them.
The key is timing, technique, and knowing which varieties need a lighter or firmer hand.
You’ll need sharp bypass pruners, thick gardening gloves (that sap is no joke), and a clear day to work. For Euphorbia milii—the spiky, colorful kind—prune right after flowering in late spring, while Euphorbia characias (the woody, shrubby type) handles light shaping in early spring.
Always cut just above a leaf node, and never remove more than a third of the plant at once.
After pruning, your euphorbia will bounce back with fresh, vibrant growth in as little as two weeks. The secret is patience: let new shoots establish before shaping again. With the right approach, you’ll end up with a tidy, thriving plant that stays healthy and full all season long.
This method works for both indoor and outdoor euphorbias, from dwarf varieties to towering specimens. The only rule? Never prune in winter unless you’re dealing with dead or diseased branches. Let’s get those plants looking their best without the guesswork.
📚 In This Guide
- What you need
- Instructions
- Tips and common mistakes
- Wrapping up and next steps
What you need
- ● Pruning shears or bypass pruners – Sharp, sterilized, and with a 3-4 inch blade (1 pair). Avoid dull tools—they crush stems instead of cleanly cutting.
- ● Clean, sharp garden knife or razor blade – For smaller cuts or detailed shaping (1-2 pieces).
- ● Rubbing alcohol (70% isopropyl) or hydrogen peroxide – For sterilizing tools (1 small bottle or spray). Prevents bacterial/fungal spread.
- ● Gloves (nitrile or heavy-duty gardening gloves) – Thick, latex-free (1 pair). Euphorbia sap is toxic—protect your skin!
- ● Newspaper or drop cloth – Waterproof, 3x3 ft minimum (1-2 sheets). Catches sap and debris.
- ○ Disposable dust mask (optional but recommended) – For dusty or indoor pruning (1 mask). Euphorbia dust can irritate lungs.
- ● Rooting hormone (gel or powder) – For propagating cuttings (small jar). Speeds up growth if you’re saving stems!
- ● Small pots with well-draining soil – 3-4 inch diameter (2-3 pots). Perfect for propagating new plants.
- ● Plant tie or twist tie – For securing cuttings to stakes (1 roll). Keeps them stable while rooting.
- ○ Pruning sealant (optional) – For large cuts (1/4 inch or thicker) (1 tube). Reduces sap oozing.
Step-by-Step guide for pruning euphorbia plants
Here’s how to shape your euphorbias with confidence—keeping them healthy and stunning all year.
✂️ Step 1: Time Your Pruning for Best Results
Prune euphorbias in early spring or late summer when new growth is actively starting. Avoid pruning during winter dormancy—this is when the plant stores energy, and cutting back too early can stress it. If you must shape in fall, do it before the first frost hits your area. Euphorbias are resilient, but timing matters for vigorous regrowth.
I like to wait until I see new shoots emerging—that’s your cue the plant is ready for a trim. For tropical varieties, late summer works best, while hardy types can handle early spring cuts. Just remember: never prune when the plant is flowering unless you’re deadheading spent blooms, as this can reduce next year’s blooms.
✂️ Step 2: Gather the Right Tools and Safety Gear
Euphorbia sap is toxic and irritating, so protect yourself with thick gardening gloves and long sleeves. Use sharp, clean pruning shears (sterilized with rubbing alcohol) to make clean cuts—dull blades tear stems and invite disease. For larger branches, grab hand pruners or a small pruning saw if the stems are woody.
I also keep milk or soap and water nearby to neutralize sap on my skin immediately if it splashes. Place cuttings in a sealed plastic bag to contain any sap drips—euphorbias ooze when cut, and this sticky milk can stain surfaces and irritate skin. Work outdoors or in a well-ventilated area to avoid inhaling any dust from the sap.
✂️ Step 3: Shape the Plant with Purposeful Cuts
Start by removing dead, diseased, or damaged branches first—these are easy to spot as they’re brown, mushy, or hollow. Cut back to a healthy node (a small bump where leaves or branches grow) or to the main stem. For shaping, reduce overgrowth by up to one-third of the plant’s height to encourage bushier growth.
I like to step back every few cuts to check the plant’s balance—euphorbias grow in interesting shapes, so preserve their natural form while thinning out crowded areas. For leggy stems, cut just above a leaf node at a 45-degree angle to prevent water from pooling. Avoid heavy pruning in one session; space cuts over 2-3 weeks if the plant looks stressed.
✂️ Step 4: Clean Up and Monitor Recovery
After pruning, sterilize your tools again with rubbing alcohol to prevent spreading sap or disease. Dispose of clippings in a sealed trash bag—never compost euphorbia cuttings, as the sap can harm other plants. Water the plant lightly after pruning to help it recover, but avoid soaking the soil, as euphorbias prefer dry conditions and can rot if overwatered.
Watch for new growth in 2-4 weeks—this signals the plant is healing well. If you see yellowing leaves or soft stems, you may have over-pruned. Euphorbias are tough, but they need time to adjust. Fertilize lightly with a balanced, water-soluble fertilizer after 4 weeks to support regrowth, but avoid heavy feeding right after pruning.
⏰ Step 5: Maintain Year-Round with Light Trims
Between major pruning sessions, snip off spent flowers (deadheading) to encourage more blooms. Trim any overly long stems in late summer to keep the plant compact. Euphorbias grow fast, so a quick check every 4-6 weeks keeps them looking their best without stress.
I also rotate the plant occasionally to ensure even growth—euphorbias stretch toward light, so turning them helps maintain a full, rounded shape. If you notice pests like mealybugs, prune affected areas immediately and treat with neem oil or insecticidal soap. Keep an eye out for sap-sucking insects, which love stressed euphorbias.
Tips & tricks for pruning euphorbia plants
Pruning euphorbias doesn't have to be intimidating—these key strategies will help you shape your plants with confidence and keep them thriving year after year.
Timing is Everything: The early spring or late summer timing in Step 1 is perfect for a reason—these are the periods when euphorbias naturally push new growth. I've learned the hard way that pruning during winter dormancy stresses the plant, so always wait until you spot those fresh green shoots emerging. For tropical varieties, late summer gives you the best results, while hardy types can handle early spring cuts without issue.
Safety First: Euphorbia sap is no joke—it's toxic and can cause skin irritation. Beyond the gloves and long sleeves mentioned in Step 2, I keep a small bottle of dish soap or milk nearby to immediately wipe away any sap splashes. The sealed plastic bag trick for clippings is a game-changer too; it contains the sticky mess and prevents staining surfaces. Always work in a well-ventilated area, especially if you're pruning indoors.
Precision Cuts Matter: When shaping in Step 3, those 45-degree angles on leggy stems aren't just for looks—they prevent water from pooling at the cut site, which can lead to rot. I've found that making cuts just above a leaf node gives the plant the best chance to regrow properly. Remember to space heavy pruning sessions over 2-3 weeks if your plant looks stressed; euphorbias are tough but not indestructible.
Recovery Monitoring: The 2-4 week window for new growth in Step 4 is your best indicator of how well your plant is recovering. If you see yellowing leaves or soft stems, it's a sign you might have over-pruned. I always keep a small notebook to track when I pruned and what the plant looked like afterward—it helps me adjust my approach for next time. Light fertilization after 4 weeks gives the plant the nutrients it needs to bounce back without overwhelming it right after pruning.
Pro Tips for Pruning Euphorbia Plants
- Pruning euphorbias doesn't have to be intimidating—these key strategies will help you shape your plants with confidence and keep them thriving year after year.
- Timing is Everything: The early spring or late summer timing in Step 1 is perfect for a reason—these are the periods when euphorbias naturally push new growth.
- Safety First: Euphorbia sap is no joke—it's toxic and can cause skin irritation.
Frequently asked questions
Got questions about pruning euphorbia plants?
Whether you're a beginner or a seasoned gardener, these common queries will help you master the art of shaping your euphorbias with confidence!
When is the best time to prune euphorbia plants?
The ideal time to prune euphorbia is late winter or early spring, just before new growth begins. This timing ensures minimal stress on the plant and promotes vigorous regrowth. Avoid pruning during extreme heat or cold, as it can weaken the plant. For shaping, light pruning can also be done in summer—just be cautious of sap irritation!
Do I need special tools to prune euphorbia?
Yes! Always use sterilized, sharp pruners or shears to make clean cuts. Wear gloves (preferably thick leather or nitrile) and long sleeves—euphorbia sap is toxic and can cause skin irritation or blisters. A damp cloth can help wipe away sap quickly if it touches your skin.
Can I propagate euphorbia from pruned cuttings?
Euphorbia cuttings root easily. After pruning, let the cuttings dry (callous) for 1-2 hours, then plant them in well-draining soil. Keep the soil slightly moist and place the pot in bright, indirect light. Roots typically form in 2-4 weeks. Pro tip: Use rooting hormone for faster success!
What should I do if my euphorbia looks leggy after pruning?
Leggy growth happens if the plant isn’t getting enough light. After pruning, move your euphorbia to a sunnier spot (at least 6+ hours of direct sunlight daily). Reduce watering slightly—overwatering can also cause weak, stretched growth. Fertilize lightly with a balanced, diluted fertilizer to encourage bushier regrowth.
Are there any euphorbia varieties that don’t need pruning?
Some euphorbias, like Euphorbia tirucalli ("pencil plant") or Euphorbia characias, grow naturally compact and may not require heavy pruning. However, even these benefit from light shaping to remove dead or leggy stems. Dwarf varieties (e.g., Euphorbia amygdaloides) are low-maintenance but still appreciate occasional trimming for fullness.
How do I clean up after pruning euphorbia?
Dispose of pruned stems safely—never compost them, as the sap is toxic. Wrap cuttings in newspaper and toss them in the trash. Clean your tools with rubbing alcohol or soapy water to remove residual sap. Wash your hands thoroughly after handling, and avoid touching your face or eyes until you’ve cleaned up.
Wrapping up and next steps
Pruning your euphorbia plants doesn’t have to be intimidating—it’s all about timing, technique, and a little patience! 🌱 With the right tools, a steady hand, and the knowledge of when to trim, you’ll keep your plants thriving year-round while maintaining their stunning shapes.
Whether you’re shaping a bold Euphorbia milii or tidying up a sprawling Euphorbia tirucalli, your efforts will reward you with healthier, more vibrant growth.
Now that you’re equipped with the how-tos, grab those shears and get pruning! Start small, observe your plant’s response, and soon you’ll master the art of stress-free pruning. Happy gardening—your euphorbias will thank you! 🌟