Tools
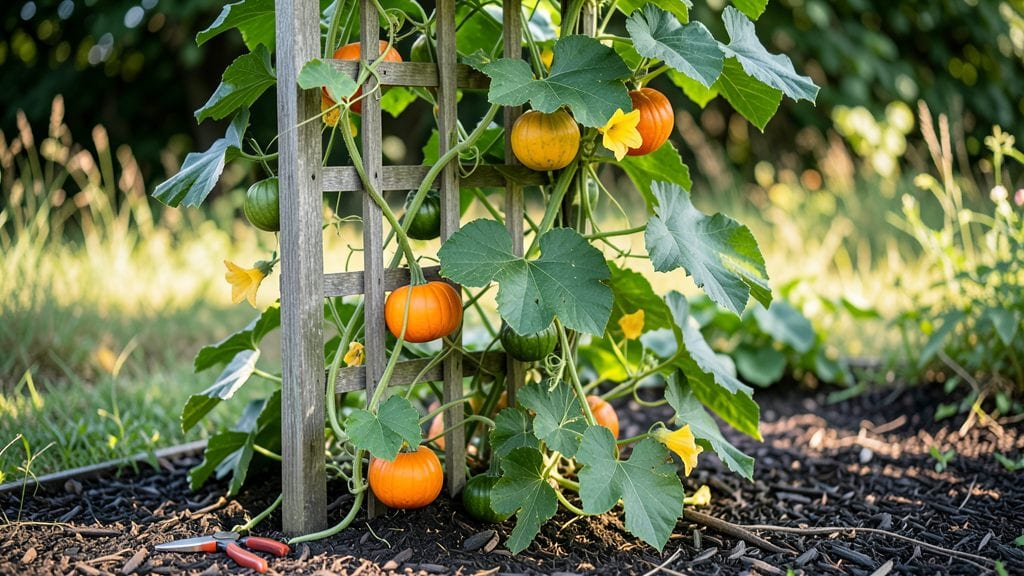
Growing pumpkins on a trellis turns sprawling vines into a vertical harvest machine. 🌱 I used to dread the tangled mess of pumpkin plants until I discovered how a sturdy trellis transforms them into neat, manageable climbers—doubling my harvest in the same space.
The secret lies in the right setup, where vines grow upward instead of outward, saving room and making care easier.
You’ll need a strong trellis (metal or wooden frames work best), twine or soft ties, and a few hours to set it up before planting. Most pumpkin varieties—especially bush types like 'Small Sugar' or 'Jack Be Little'—thrive when trained vertically.
The key is starting early: install the trellis at planting time and gently guide vines upward as they grow, securing them every 12 inches to prevent sagging.
By midseason, you’ll see the payoff: cleaner plants with fewer pests, easier harvesting, and pumpkins that stay off the ground where they’re less prone to rot. The vines grow stronger when supported, and you avoid the usual battle with sprawling plants taking over the garden.
Plus, your neighbors will ask how you fit so many pumpkins in such a small space.
This method works for any garden size, from small urban plots to backyard patches. The only challenge is occasional pruning to manage side shoots, but the trade-off—more pumpkins with less effort—makes it worth it. Ready to try it?
📚 In This Guide
- What you need
- Instructions
- Tips and common mistakes
- Wrapping up and next steps
What you need
- ● Trellis Structure: 6–8 wooden posts (4x4 inches, 6–8 feet tall) or sturdy metal T-posts (for durability).
- ● 4–6 horizontal slats or lattice panels (2x4 inches, 4–6 feet long) or pre-built trellis netting (5–6 feet wide).
- ● Galvanized screws or heavy-duty staples (3–4 inches long, 20–30 pieces).
- ● Fasteners & Hardware: Galvanized corner braces (4–6 pieces) or metal straps.
- ● Hammer or power drill.
- ○ Support Add-Ons (Optional but Helpful): Burlap strips or soft plant ties (10–15 feet) to secure vines gently.
- ● PVC pipes or wire mesh (for lightweight, budget-friendly trellises).
- ● Post anchors or concrete mix (if securing posts in windy areas).
- ● A sunny spot with full sun (6–8+ hours daily) and well-draining soil.
- ● Pumpkin seeds or seedlings (choose vining varieties like ‘Sugar Pie’ or ‘Jack Be Little’).
- ● Space! Ensure your trellis is at least 5–6 feet wide to accommodate sprawling vines.
Step-by-step instructions for building a pumpkin trellis
Here’s how to create a sturdy trellis that turns sprawling vines into a vertical harvest.
🪴 Step 1: Choose the Right Location and Materials
Pumpkins need full sun (6+ hours daily) and well-draining soil. Pick a spot with 6 feet of vertical space—a sturdy fence, pergola, or freestanding frame works best. I use 4-foot wooden posts sunk 1 foot deep into the ground, spaced 8 feet apart in a square or rectangular shape. This creates a stable base for the vines to climb.
For the trellis itself, I weave 1-inch diameter PVC pipes horizontally between posts, spacing them 12 inches apart vertically. This gives vines plenty of support without crowding. If you’re using metal or bamboo, ensure it’s corrosion-resistant—rust weakens the structure over time.
🌱 Step 2: Plant Pumpkin Seeds Near the Trellis
Sow seeds 2 inches deep and 6 inches apart in a circle around the trellis base. Pumpkins have large root systems, so give them room to spread horizontally before training vertically. Water deeply right after planting to settle the soil—this prevents roots from drying out during germination.
I like to plant 4 seeds per trellis (since you get 4 servings from this setup). Once the seeds sprout, thin to the 2 strongest seedlings, leaving the rest for compost. You’ll know they’re ready to climb when vines reach 6-8 inches long—that’s when they start searching for support.
✂️ Step 3: Train Vines Upward as They Grow
When vines hit 12 inches long, gently weave them through the trellis openings. Pumpkins climb using tendrils, so guide them upward by tucking the tips into the gaps. Avoid forcing vines—let them curl naturally. If a vine slips, secure it loosely with soft plant ties (never wire, which can cut into stems).
Here’s the thing—I’ve seen growers rush this step and end up with tangled messes. Instead, take your time. Every 3-4 days, check for new growth and redirect any stragglers. By 4-6 weeks, your vines should be climbing steadily. Prune any side shoots that form below the trellis to focus energy upward.
💧 Step 4: Water and Fertilize for Vertical Growth
Pumpkins on trellises need consistent moisture—water at the base 1-2 inches per week, more in hot weather. I use a soaker hose to avoid wetting leaves, which prevents fungal diseases. Mulch with 2 inches of straw to retain moisture and keep roots cool.
Feed plants every 2 weeks with a balanced fertilizer (10-10-10) until flowers appear, then switch to a low-nitrogen, high-phosphorus blend (5-10-10) to encourage fruit development. You’ll see stronger vines and bigger blooms when you do this—it’s like giving them a growth boost.
☀️ Step 5: Monitor and Adjust for Maximum Yield
Check the trellis weekly for overcrowded vines. If two stems compete for the same space, prune the weaker one at the base. Pumpkins produce both male and female flowers—look for the tiny pumpkin-shaped bump at the base of female blooms. Hand-pollinate by transferring pollen from male to female flowers with a paintbrush for bigger fruit.
By 8-10 weeks, your pumpkins should be climbing the full height of the trellis. If growth slows, check for pests (like squash bugs) or nutrient deficiencies (yellowing leaves). A quick spray of neem oil or a boost of compost tea usually fixes the issue. Harvest when rinds harden—now you’ve got vertical pumpkins without sacrificing space!
Tips & tricks for perfect pumpkin trellis planting
Building a pumpkin trellis isn't just about saving space—it's about maximizing your harvest with less effort. Here are the secrets I've learned after years of experimenting with vertical pumpkin growth.
Location and Material Matters: The 6-foot vertical space requirement isn't arbitrary—pumpkin vines can grow much taller if given the chance, but this height ensures proper support without toppling. I've found that wooden posts sunk 1 foot deep provide the best stability, especially in windy conditions. For the trellis framework, 1-inch diameter PVC pipes are my go-to because they're lightweight yet sturdy, and the 12-inch vertical spacing gives vines room to breathe without getting tangled. Real talk: I tried bamboo once, but it warped in the first heavy rain.
Timing is Everything: Those 6-8 inches before vines start climbing are crucial. This is when the tendrils develop—the natural hooks pumpkins use to grab support. I've seen growers miss this window and end up with sprawling vines that never quite make it up. Check every 3-4 days starting when seedlings hit 4 inches—this is when you'll notice the first tendril curls forming. Once they're ready to climb, gently guide them through the trellis openings rather than forcing them. Think of it like helping a toddler climb a jungle gym—patience prevents injuries.
Watering Wisdom: The 1-2 inches of water per week guideline works, but timing matters more than you'd think. I water in the early morning so the leaves have all day to dry, which dramatically reduces fungal diseases. That 2-inch straw mulch layer isn't just for moisture—it also keeps roots cool during hot afternoons. Between us, I've lost entire trellis crops to overheated roots when I skipped the mulch during a heatwave. The soil should stay consistently moist but not soggy—you can check by sticking your finger 2 inches down.
Pruning Pro Tip: When you see those side shoots forming below the trellis in Step 3, don't hesitate to prune them. I know it seems counterintuitive to remove growth, but those side shoots drain energy that could be going to your main vines and fruit. Focus all that plant power upward where it counts. And here's what nobody tells you—if you're getting more than 2-3 female flowers per plant, prune some of the extra ones. Too many flowers mean smaller pumpkins, and we want those big, beautiful harvests.
Pro Tips for Pumpkin Plant Trellis
- Building a pumpkin trellis isn't just about saving space—it's about maximizing your harvest with less effort.
- Location and Material Matters: The 6-foot vertical space requirement isn't arbitrary—pumpkin vines can grow much taller if given the chance, but this height ensures proper support without toppling.
- Timing is Everything: Those 6-8 inches before vines start climbing are crucial.
Frequently asked questions
Got questions about growing pumpkins vertically? You’re not alone!
Here are some of the most common queries—and practical answers—to help you trellis like a pro.
What’s the best time to start training pumpkins up a trellis?
Plant your pumpkin seeds or seedlings when soil is at least 60°F (15°C) and all frost risk has passed. Start guiding vines onto the trellis once they’ve sprouted 3–5 leaves (about 2–3 weeks after planting). Early support prevents weight stress later!
Can I use any trellis, or are there specific types for pumpkins?
Pumpkins need sturdy, wide-support trellises—think A-frame, cage-like structures, or heavy-duty netting (like Trellis netting or PVC pipe frames). Avoid flimsy materials; pumpkins can weigh 20+ lbs each! For vining varieties (like ‘Sugar Pie’), opt for 6–8 ft tall supports.
Why are my pumpkin vines falling off the trellis? How do I fix it?
Common culprits:
- Overgrowth: Prune excess vines (keep 2–3 main runners) to reduce weight.
- Weak ties: Use soft plant ties or old T-shirts (not wire!) to secure vines gently.
- Late start: If vines are too heavy, harvest smaller pumpkins or add extra support.
Are there pumpkin varieties that don’t need trellises?
Yes! Bush-type pumpkins (like ‘Jack Be Little’ or ‘Autumn Gold’) stay compact (3–4 ft tall) and don’t require trellises. However, they yield fewer pumpkins. For max harvests, stick with vining varieties (e.g., ‘Howden’ or ‘Cinderella’) and trellis them!
How do I keep pumpkins from rotting when trellised?
Elevate fruits off the ground using slings, hammocks, or small boards. Ensure good airflow by spacing vines apart. Avoid overhead watering—use drip irrigation instead. If mold appears, prune affected areas immediately.
Can I reuse a pumpkin trellis for next year?
Clean and store wooden/metal trellises in a dry place. For netting, shake off debris and sun-bleach if moldy. Disinfect with a 1:10 bleach-water mix to prevent disease. Pro tip: Label your trellis with the pumpkin variety for future reference!
Wrapping up and next steps
Transforming your pumpkin patch into a vertical garden isn’t just clever—it’s a game-changer for space, yield, and ease of care! 🌱 By mastering a pumpkin plant trellis, you’ll unlock bigger harvests, healthier vines, and a garden that’s both functional and stunning.
Whether you’re a seasoned gardener or a curious beginner, this method proves that great things do come in small spaces.
Ready to turn your garden into a pumpkin paradise? Grab your trellis, roll up your sleeves, and start climbing toward success—your future giant pumpkins are waiting! 🎃✨ Next, explore our guide on training vines for optimal growth.