Fertilization
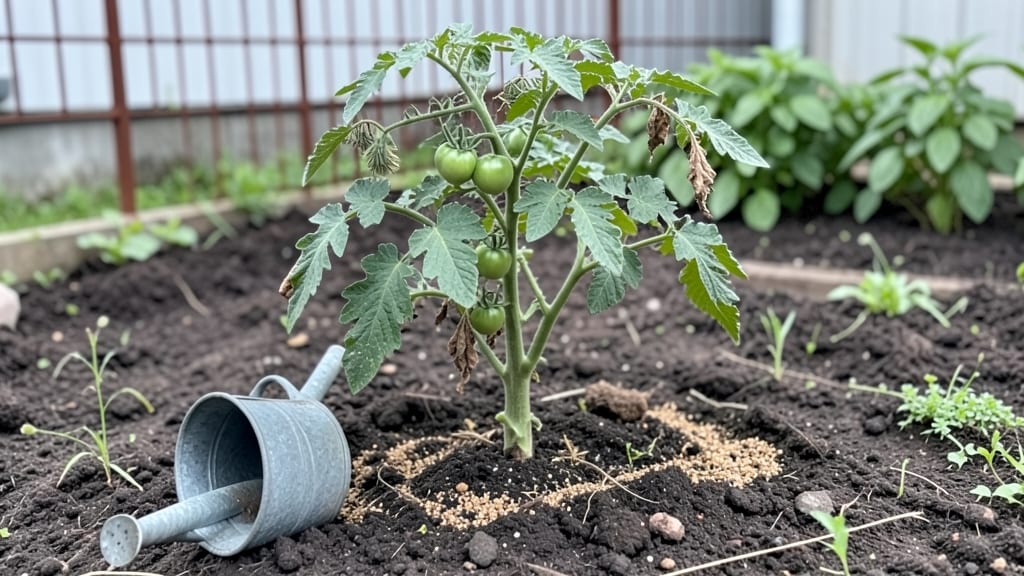
Fertilizing garden plants isn't about dumping bags of chemicals—it's about feeding your soil the right way for plants that look like they're from a catalog. I learned the hard way that too much nitrogen turns tomatoes leafy but fruitless, while the right balance makes them explode with flavor.
The key is matching what your plants need with what the soil provides.
You'll need three things: a soil test kit (or a basic understanding of your soil type), a fertilizer with the right NPK ratio for your crops, and a schedule that starts before planting and continues through harvest.
Organic options like compost or fish emulsion work slowly but build soil health, while synthetic fertilizers give quick results but require more care. Most gardeners need two applications—once at planting and again mid-season—but some heavy feeders like peppers and squash need a third.
What you'll end up with is plants that grow strong roots, vibrant green leaves, and the kind of fruit or flowers that make neighbors ask, "What are you doing differently?" The secret isn't in fancy products—it's in paying attention to what your plants are telling you.
Yellow leaves? Probably nitrogen. Purple stems? Phosphorus. And brown edges? Time to check your watering. It's all about balance.
This works for vegetables, flowers, and even fruit trees—just adjust the ratios based on what you're growing. Whether you're working with a small container garden or a full backyard plot, the same principles apply. Let's get those plants fed right.
📚 In This Guide
- What you need
- Instructions
- Tips and common mistakes
- Wrapping up and next steps
What you need
- ● Fertilizer: Balanced (10-10-10) or slow-release granular fertilizer – 2–4 lbs per 100 sq ft (check package for exact ratios).
- ● Organic options: Composted manure (5–10 lbs per 100 sq ft), worm castings (1–2 lbs per plant), or bone meal (1 tbsp per plant for phosphorus).
- ● Liquid fertilizer (e.g., fish emulsion or seaweed extract) – 1–2 tbsp per gallon of water (for foliar sprays or soil drenches).
- ○ Soil test kit – Optional but highly recommended to check pH (aim for 6.0–7.0) and nutrient levels before fertilizing.
- ● Garden tools: Hand trowel or small spade (for mixing fertilizer into soil).
- ● Garden hose with adjustable nozzle (for watering down liquid fertilizers).
- ● Measuring cups/spoons (for precise fertilizer doses).
- ● Watering can or spray bottle – For applying liquid fertilizers evenly.
- ● Gloves and protective eyewear – Especially when handling granular or organic fertilizers.
- ● Soil amendments: Perlite or vermiculite (to improve drainage), peat moss (for acid-loving plants).
- ● pH adjusters: Lime (to raise pH) or sulfur (to lower pH) if your soil test reveals imbalances.
- ● Slow-release fertilizer spikes – Great for container plants or long-term nutrient delivery.
- ● Compost tea maker – For DIY liquid organic fertilizers (brew at home for a nutrient-packed boost!).
- ● Labeling sticks or markers – To track what you’ve fertilized and when.
Instructions for fertilizing garden plants like a pro
Here’s how to keep your garden thriving all season with simple, science-backed feeding strategies.
Test Your Soil First
Before adding any fertilizer, grab a soil test kit from your local extension office or garden center. This tells you exactly what nutrients your plants are missing—whether it’s nitrogen for leafy growth, phosphorus for roots, or potassium for resilience. I’ve seen gardeners waste money on fertilizers their soil already has in excess. Test in early spring, then again mid-season if you notice stunted growth or yellowing leaves.
Dig a small sample from 4-6 inches deep in multiple spots, mix them together, and follow the kit instructions. If you’re impatient, a quick visual check works: dark, crumbly soil with earthy smell needs feeding, while compacted or chalky soil may need organic matter first. This step ensures you’re not over- or under-fertilizing from day one.
Choose the Right Fertilizer for Each Plant Type
Not all fertilizers work for every plant. Leafy greens like lettuce and spinach thrive on nitrogen-heavy fertilizers, while flowering plants such as tomatoes and peppers need a balanced blend with more phosphorus. Always check the label—look for numbers like 10-10-10 or 5-10-5, which represent nitrogen-phosphorus-potassium ratios. For vegetables, I use a 10-10-10 all-purpose fertilizer early in the season, then switch to a tomato-specific 5-10-10 blend when flowers appear.
Avoid slow-release fertilizers for fast-growing plants like radishes or lettuce—they need quick nutrient uptake. Instead, opt for water-soluble fertilizers that dissolve immediately. For perennials and shrubs, slow-release granules work best, feeding roots gradually over months. This targeted approach prevents nutrient waste and keeps plants healthy without burnout.
Apply Fertilizer at the Right Time and Rate
Timing matters more than you think. Feed young seedlings lightly with half the recommended dose to avoid shocking tender roots. Once plants establish—usually when they’ve developed 3-4 true leaves—switch to full strength. I always fertilize in the morning so any excess water can evaporate by evening, reducing leaf burn risk. Water the soil thoroughly before and after applying fertilizer to help nutrients penetrate roots.
Follow package rates precisely—over-fertilizing is just as harmful as under-fertilizing. For example, tomatoes need feeding every 2-3 weeks, while perennials only require a mid-season boost. If you notice crispy leaf edges or white crust on soil, you’ve overdone it. Flush the soil with extra water to leach out excess salts, then hold off on fertilizing for a week.
Use Organic Amendments for Long-Term Soil Health
While synthetic fertilizers provide quick fixes, organic amendments like compost or worm castings build soil fertility over time. Mix 1-2 inches of compost into the top 6 inches of soil before planting, and top-dress annuals with a thin layer mid-season. I swear by compost tea—steep compost in water for 24 hours, strain, and use as a foliar spray or soil drench. It’s packed with beneficial microbes that improve nutrient absorption.
For problem soils, try mycorrhizal fungi granules. These tiny organisms form symbiotic relationships with plant roots, helping them uptake water and nutrients more efficiently. Sprinkle them into planting holes when transplanting—especially for trees, shrubs, and perennials. This step future-proofs your garden against nutrient deficiencies year after year.
Monitor and Adjust Throughout the Season
Your garden’s needs change as the season progresses. Check plants weekly for signs of deficiency: yellow lower leaves signal nitrogen needs, purple stems mean phosphorus is lacking, and weak stems with brown tips point to potassium deficiency. Adjust your fertilizer blend accordingly. I keep a small notebook by the garden to jot down observations—like when my peppers developed weak stems and needed extra potassium.
Rain can wash away nutrients, so reapply fertilizer after heavy downpours. If you notice mushrooms or mold in the soil, it’s a sign of over-fertilizing or poor drainage. In that case, switch to a lighter feeding schedule and improve soil aeration by adding sand or perlite. This proactive approach keeps your garden lush without guesswork.
Tips & tricks for perfect season-long plant fertilizing
These simple strategies will help you avoid common mistakes and get the most out of your garden's nutrient plan.
The Soil Test Secret: Don't skip testing your soil before fertilizing—it's the foundation of everything. I've seen gardeners waste money on fertilizers their soil already has plenty of. If you're impatient for results, look for dark, crumbly soil with an earthy smell that indicates it's ready for feeding. For problem soils, consider adding organic matter like compost first before testing again in 4-6 weeks.
Fertilizer Timing Matters: In Step 3, remember that young seedlings need only half the recommended dose to avoid shocking tender roots. Once they've developed 3-4 true leaves, you can switch to full strength. I always fertilize in the morning to give any excess water time to evaporate by evening, which helps prevent leaf burn. This precise timing makes all the difference in plant health.
Organic Amendments Boost: The 24-hour compost tea I mentioned in Step 4 is a game-changer for nutrient absorption. After steeping compost in water, strain it through a fine mesh bag or cheesecloth. This liquid gold can be used as both a foliar spray and soil drench. For problem soils, mix mycorrhizal fungi granules directly into planting holes—they'll form beneficial relationships with roots that last for years.
Visual Deficiency Guide: When monitoring plants in Step 5, remember these visual cues: yellow lower leaves mean nitrogen deficiency, purple stems indicate phosphorus needs, and weak stems with brown tips signal potassium deficiency. Keep a small notebook by your garden to track these observations—it's the best way to adjust your fertilizer blend as the season progresses.
Pro Tips for Fertilizing Garden Plants
- These simple strategies will help you avoid common mistakes and get the most out of your garden's nutrient plan.
- The Soil Test Secret: Don't skip testing your soil before fertilizing—it's the foundation of everything.
- Fertilizer Timing Matters: In Step 3, remember that young seedlings need only half the recommended dose to avoid shocking tender roots.
Frequently asked questions
Got questions about fertilizing your garden? You’re not alone!
Here are answers to the most common concerns—so you can grow lush, thriving plants with confidence.
How often should I fertilize my garden plants?
Most plants benefit from fertilization every 4–6 weeks during the growing season (spring to fall). Slow-release granules last longer (3–4 months), while liquid fertilizers need more frequent applications (every 2–3 weeks). Always check your fertilizer’s label for specific guidelines—overdoing it can harm roots!
What’s the best time of day to fertilize?
Apply fertilizer in the early morning or late afternoon to avoid burning plants in hot sun. This gives roots time to absorb nutrients without stress. Water thoroughly before and after to help distribution. Pro tip: Avoid fertilizing when rain is forecasted—it can wash away nutrients!
Can I use coffee grounds or eggshells as fertilizer?
Coffee grounds add nitrogen (great for acid-loving plants like blueberries), while crushed eggshells provide calcium (ideal for tomatoes and peppers). Mix them into compost or topsoil for a natural boost. Just balance them with other nutrients—these are supplements, not full replacements.
Why are my plants wilting after fertilizing?
Wilting can signal over-fertilization or salt buildup (common with synthetic fertilizers). Flush the soil with water to dilute excess salts, and reduce fertilizer strength by half. If roots look brown or mushy, they’re burned—stop fertilizing and focus on hydration. Always start slow with new plants!
Do I need different fertilizers for flowers vs. vegetables?
Yes! Vegetables (like tomatoes and peppers) need a balanced NPK (10-10-10) or high-phosphorus (5-10-10) fertilizer for fruiting. Flowers (e.g., roses, petunias) thrive on a low-nitrogen, high-phosphorus (5-10-5) mix to encourage blooms. Herbs often prefer a light, organic fertilizer like fish emulsion. Tailor it to your plants’ needs!
Wrapping up and next steps
Fertilizing your garden isn’t just about feeding plants—it’s about unlocking their full potential! 🌱 By mastering the three key nutrients (nitrogen, phosphorus, and potassium) and timing applications to the season, you’ll enjoy lush foliage, vibrant blooms, and bountiful harvests.
Whether you’re a beginner or a seasoned gardener, these tricks make nurturing your plants simple and rewarding.
Ready to see your garden thrive? Start small—try one of these nutrient-focused strategies this week, then build from there. Happy gardening! 🌿